Quick and Easy Reading Pillow
 Snuggle up with a good book and a pillow. Make this quick and easy pillow with a built-in pocket to hold a favorite book and maybe even a few toys and a snack. Use it at home or on the go. It makes the perfect personalized gift. This is a great beginner’s project.
Materials Needed:
- ½ yard of fabric for front and back
- Fat quarter of fabric for pocket
- Matching thread
- Iron-on letters, fabric for applique or embroidery machine for the letters
- 16” x 16″ pillow form
Cutting Instructions:
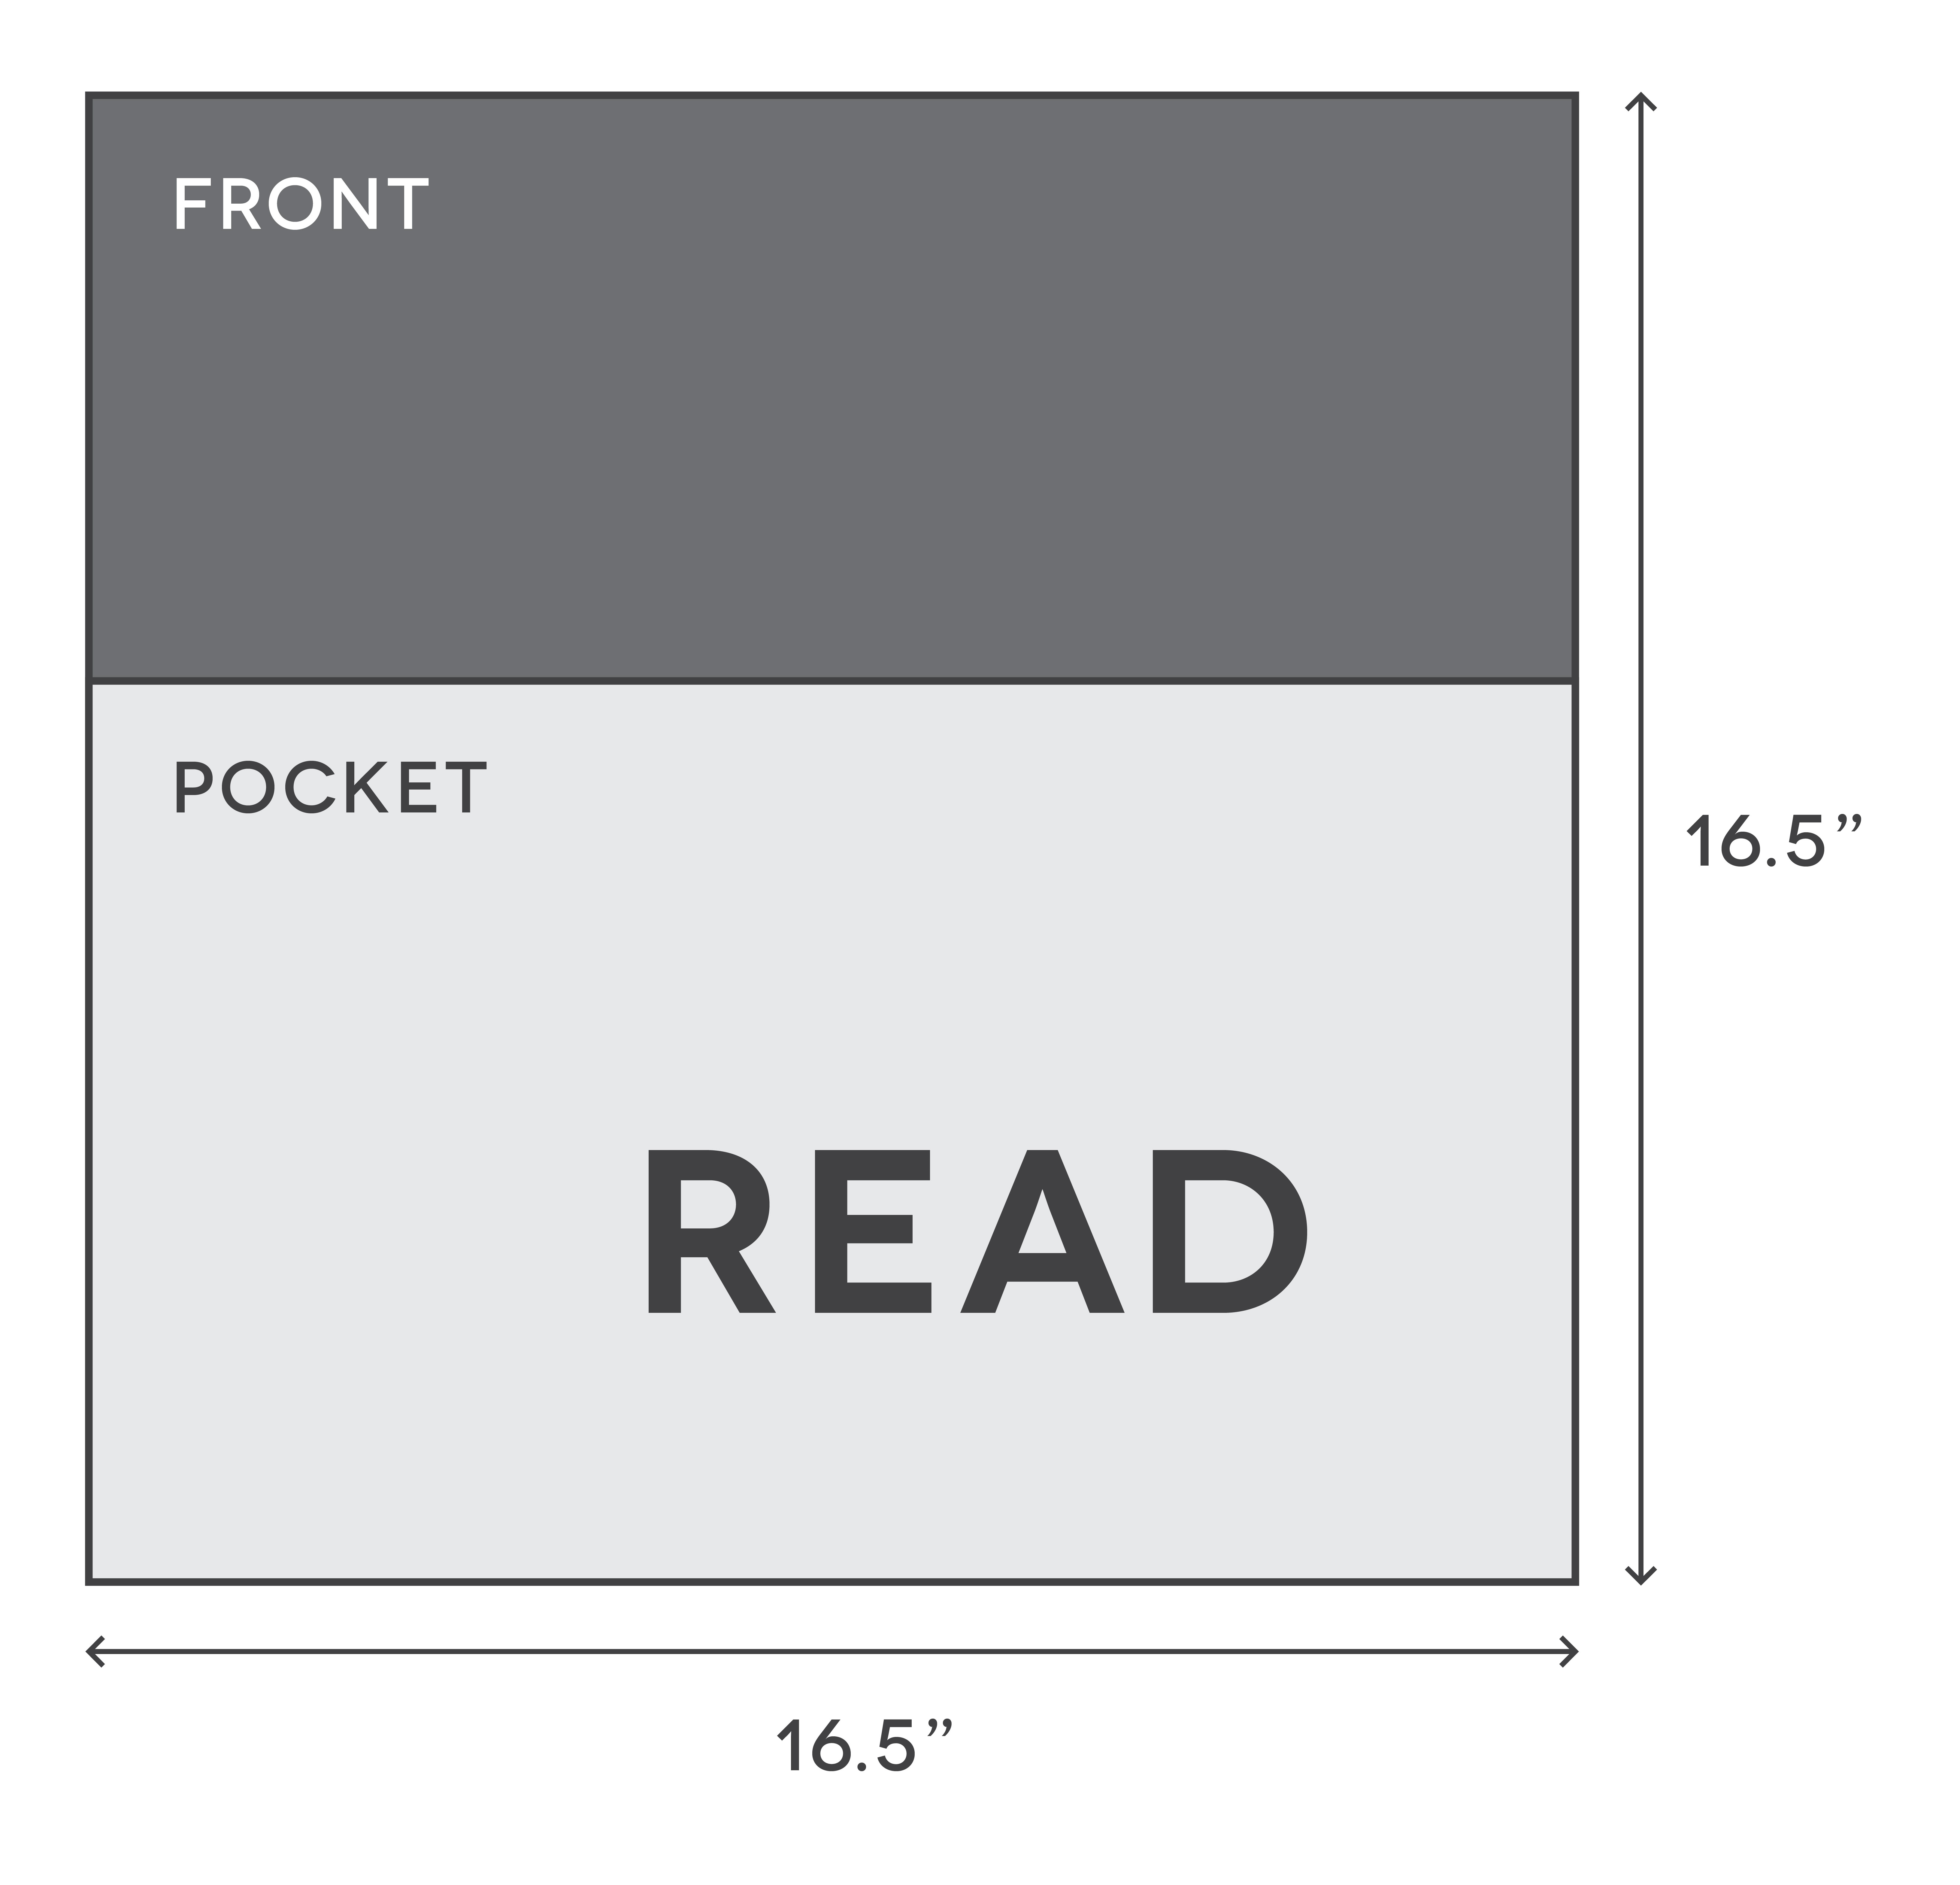
(1) 16 1/2″ x 16 1/2″ fabric for front
(2) 16 1/2″ x 11″ fabric for back
(1) 16 1/2″ x 20″ for pocket
Sewing Instructions:
- Fold pocket fabric in half so that it measures 10″ x 16 1/2″.
- Apply letters by method of your choice — applique, purchased iron- on letters or with an embroidery machine. Choose a word that you want on the pillow. It can be “READ,” a name or whatever you want.
- The word should be approximately 3″ from the bottom edge and 3″ from the right edge.

- Hem one 16 1/2″ edge on both back pieces. Fold over 1/4″ and press. Fold over 1/4″ again and press so that the raw edge is enclosed.
- Stitch along each edge.
- Baste pocket piece to the bottom of the front fabric piece.
- Lay the front pocket piece right side up.
- Place the two back pieces right sides down onto the front piece so the corners and edges match on the top and the bottom and the hemmed edges overlap in the center. Overlap the two back sections.

- Pin in place.
- Sew 1/4″ seam on each side.
- Turn right sides out through the back enclosure and put pillow form inside.