Container Gardening // 7 Tips that Thrill, Fill and Spill

ContainerGardening

The potential of your garden is limitless with container gardening. Try out these tips to keep your garden ever growing, changing and blooming in style.


Contained Beauty

Container gardening has become popular as planting areas in the landscape have become smaller. Some containers are used to grow vegetables or specimen shrubs, while others display a beautiful splash of color. For thrilling container gardens, consider these tips.

• Containers need large enough drainage holes in the bottom to prevent soil from clogging the hole while still promoting proper drainage. If the drainage hole is too large, soil will leak through the bottom each time the container is watered. Prevent this problem by placing a large rock or solid object over the hole. This allows water to drain around it and keeps the soil in place.

• Planters must be large enough to accommodate the root system of the plants. Often, annuals or vegetable plants are crammed into a small planter, and then gardeners wonder why the plants stay small or need excessive amounts of water. As a general rule, any pot 8 inches or smaller in diameter will only hold small plants. Most annual or perennial containers should be a minimum of 8 to 10 inches in diameter, and larger pots are more desirable. After all, the goal of having annuals is to make a large splash of color in the landscape, not a dribble.

• There is an art to designing annual containers, often referred to as thrill, fill and spill. This refers to the principle of placing an upright plant in the center of the container that “thrills” the eye and draws attention. Next, the planter is “filled” with an accenting color and finally one or two plants are placed to “spill” over the sides to soften the appearance and extend the color.

• The spike dracaena is commonly used as a center “thrill” for planters; however, many other plants work equally well to catch the eye. Some include red fountain grass, snapdragons, geraniums, salvia, coleus and dahlias. These plants reach a height of 8 inches or more and stand out in a crowd of annuals.

• There are a number of good choices for “filling” a container with annuals. The most important consideration is to select colors and flowers you like. Next, keep in mind that they should not overpower the plant used to “thrill” nor hide the plants that “spill.” Osteospermum, million bells, bidden, some zinnias and impatiens work well.

• For plants that “spill,” there is the black-eyed Susan vine, wave petunias, sweet potato vine, licorice plant, alyssum and lobelia. Some of these plants also climb, which can be both a plus and a problem when they attempt to take over the basket or move up a post. For this reason, flower baskets should be pruned as needed.

• A critical component in the container is the soil. It should hold water, but also drain. A number of good potting soils are available at local nurseries and garden centers. Keep in mind that you get what you pay for when purchasing potting soil. Along with the proper soil, it is important to provide the plants with sufficient fertilizer. Normally this means either applying a slow-release fertilizer at planting time or using a water-soluble fertilizer every couple of weeks.


This article was written by Jerry Goodspeed, Utah State University Extension horticulturist, 435-919-1276, jerry.goodspeed@usu.edu



Easy Ways to Brighten Up Your Winter!

Citrus Blog

Brighten up your winter with fresh citrus!


Fresh Start

An abundance of citrus fruits are available in grocery stores this time of year. Their bright colors greet you as you walk into the produce department. Use these fruits to escape the January blues and add some color to your cooking and your kitchen!

Citrus fruits can help you get back on track to a healthy lifestyle after the holidays. They’re also a fun way to splash some freshness and color into a mundane winter menu.

Along with being delicious and refreshing, citrus fruits are full of vitamin C. Citrus fruits also promote heart health and reduce the risk of some chronic diseases. They have been known to aid in cancer prevention and are useful in diabetes sugar level control. Other important nutrients found in citrus fruits are fiber, folate, lypocene, potassium and vitamin B6.

Citrus fruits are also objects of beauty and decor. A bowl of fresh fruit makes a great centerpiece. It can also remind you that selecting a piece of fruit rather than candy or cookies is a wise choice.

It is smart to keep fresh fruit within reach to encourage daily consumption. USDA’s MyPlate recommends eating 2 cups of fruit every day. This may be in the form of juice, fresh, canned or dried fruits.

Here are some quick ways to increase citrus fruits in your daily diet.

• Add oranges and lemons to water to allow infusing overnight.
• Eat half a grapefruit every morning for breakfast.
• Have a citrus snack every day. Throw an orange or clementine in your purse or bag on your way out the door.
• Top veggies or salads with a fresh squeeze of lemon to enhance the flavor.
• Prepare entrees centered around a citrus theme.

Below you will find recipes for a salad, an entrée and a dessert all focused on delicious citrus. Enjoy!

Tossed Green Salad with Citrus Dressing:
• 4 cups torn fresh spinach
• 4 cups torn leaf lettuce
• 2 (11 oz.) cans mandarin oranges
• ¼ small red onion, thinly sliced
• 2 tablespoons thinly sliced radishes

Dressing:
• ½ cup orange juice
• ¼ cup lemon juice
• ¼ cup olive oil
• ½ teaspoon seasoned salt
• ¼ teaspoon paprika
• Pepper to taste

Toss spinach, lettuce, oranges and radishes in salad bowl. Combine dressing ingredients and whisk together until blended. Serve with salad. Refrigerate leftover dressing. Yield: 8 servings

Lemon Chicken Stir Fry
• 1 lemon
• ½ cup reduced-sodium chicken broth
• 3 tablespoons soy sauce
• 2 teaspoons cornstarch
• 1 tablespoon canola oil
• 1 pound boneless skinless chicken breast, cut into 1-inch pieces
• 1 onion, diced
• 3 cups sliced mushrooms
• 1 cup sliced carrots (1/4 inch thick)
• 2 cups snow peas, stems and strings removed
• 1 tablespoon chopped garlic

Grate 1 teaspoon lemon zest and set aside. Juice the lemon and whisk 3 tablespoons of juice with broth, soy sauce and cornstarch in a small bowl. Set aside. Heat oil in a large skillet over medium-high heat. Add chicken and cook, stirring occasionally, until cooked through. Transfer chicken to a plate. Add onion, mushrooms and carrots to the pan and cook until the carrots are just tender, about 5 minutes. Add snow peas and reserved lemon zest. Cook, stirring until fragrant, about 1 minute. Whisk the broth mixture and add to the pan. Cook, stirring until thickened, 2-3 minutes. Add chicken and heat through. Yield: 4 servings

Orange Gladness
• 2 oranges, peeled, separated and chopped
• 8-ounce can crushed pineapple, drained
• 6-ounce package sugar-free orange gelatin
• 16 ounces low fat cottage cheese
• 8-ounces fat-free whipped topping, thawed

Place the oranges and pineapple in a large mixing bowl. Prepare orange gelatin according to instructions on the box. Pour heated gelatin mixture over fruit in mixing bowl. Mix well and allow to chill for 2-3 hours. Once chilled, mix in the cottage cheese. Last, gently fold in the whipped topping. Yield: 6-8 servings


Ask A Specialist // The Power of Pomegranates

PomegranatePod

Pomegranates are an amazing alternative to holiday sweets!


Powerful Pomegranates

As the holidays approach, fresh pomegranates become readily available. Pomegranates are found in most Utah grocery stores from October through December, and two varieties are grown in Washington County.

These native Mediterranean and Middle Eastern fruits used in anything from salads to desserts are an excellent source of phytochemicals, making them one of the best antioxidants available.

The edible seeds of these yellow-orange to deep-red colored fruits have a citrus flavor and make a delicious juice.

Over the last few years, the health value of the pomegranate has been studied.  Preliminary research shows that the pomegranate may be one of the best antioxidant fruits that can fight cancer, slow the aging process, increase heart health and slow the progression of Alzheimer’s disease. Several studies from UCLA and USDA indicate that pomegranates are a major stabilizer of cancer. The naturally occurring antioxidants in this fruit fight the free radicals that promote disease. 

One average pomegranate contains about 100 calories and 25 grams of sugar and is a good source of potassium. Consider this information when preparing the healthy fruit.

• To open a pomegranate, cut off the blossom end and score through the skin marking the fruit in quarters. Submerge the pomegranate in ice-cold water and rub the seeds off the skin. The skin will float to the top, the seeds to the bottom, and then they can be drained. See the demonstration video athttp://tinyurl.com/peelingpomegranates.

• To store pomegranates, keep them at room temperature for a week, then refrigerate in an air-tight bag for up to 3 months or freeze the seeds for 6 months to a year. 

Pomegranates are enjoyable in salsa, salads, with main dishes, as jelly and syrup or just by the handful.


Dixie Pomegranate Fresh Salsa
1 pomegranate, seeded
2 oranges, peeled and cut into small pieces
1 bunch cilantro
1 jalapeño pepper, chopped
1 tomato, diced
1/2 teaspoon ground cumin
1-2 tablespoons lime juice

Score pomegranate and break apart in ice water. Drain the seeds. Add all ingredients and chill for 2 hours before serving.

Pomegranate Jelly
3 1/2 cups pomegranate juice, fresh, bottled or frozen and thawed
1/4 cup lemon juice
1 package (2 ounces) powdered pectin
4 1/2 cups sugar

Combine pomegranate juice, lemon juice and pectin in a 4 or 5-quart pot. Bring to a boil over medium-high heat, stirring constantly. Stir in sugar until well blended; return to a boil and continue boiling, uncovered, stirring occasionally for 2 minutes. Remove jelly from heat immediately. Put in jars and process in hot water bath for 15 minutes. Cool for 24 hours, then remove the ring before storing.


By Carolyn Washburn, Utah State University Extension associate professor, carolyn.washburn@usu.edu


Vanilla and Its Uses During The Holidays

Author – Carolyn Washburn

vanilla-and-it's-uses-during-the-holidays

Enhance the flavor of your favorite cooking recipes with the vanilla bean.

Vanilla flavoring is a desirable sweet flavor that is used in many recipes from cookies and candies to drinks. Vanilla comes as an extract, powder and paste. These forms of vanilla come from beans that are grown on an orchid plant. Growers pollinate the long pods and ferment them for about 6 months before harvesting. This laborious process results in the flavoring becoming one of the most expensive. To cook with vanilla beans, you simply split open the pod and scrape out the pulpy seeds inside.  Each pod will have tiny seeds that have a strong vanilla aroma.

An imitation vanilla extract is made from synthetic flavorings with alcohol and may not be quite as desirable as an authentic vanilla flavor.

Vanilla beans take on the flavor and aroma from where they are grown. The most common types of beans are grown primarily in Madagascar, Mexico and Tahiti. The Madagascar bean (also known as a bourbon bean) is very thin and very rich in sweetness. The thick skin covers many small seeds that provide a strong vanilla aroma. This accounts for about 80 percent of most vanilla extract. The Mexican bean is not as thin or sweet as the Madagascar bean. This bean has an earthy aroma and is more mellow in flavor. The Tahiti bean is plumper in size, darker in color and the least sweet of the beans. The perfect vanilla bean is 5 to 7 inches long and should feel moist and supple (not dry and brittle) when rolled between your fingers.

Fresh vanilla beans can be used in cooking as well as in making vanilla extract. One 2-inch piece of vanilla bean = 1 tsp. extract. Vanilla beans are made into an extract which is aged from 2 to 6 months and contains a minimum of 35 percent alcohol.

Vanilla beans will dry out and become brittle if left out in the air, so wrap them in foil, seal them in a zip-top bag and store them in a cool, dark area. They’ll last this way for at least several months.

Enjoy the flavor and aroma of the fresh vanilla bean!

Vanilla Bean Custard
2 cups milk
2 vanilla bean pods
1/2 cup plus 1 tablespoon sugar
1 egg
3 egg yolks
1/4 cup cornstarch

Bring milk to a simmer in a heavy-bottomed saucepan over medium heat. Add the vanilla beans from the bean pod (split the pod and scrape them out with the tip of a knife).

In a bowl whisk together the sugar, eggs, yolks and cornstarch until smooth. Slowly add about half of the milk to the egg mixture and then pour the egg mixture into the saucepan containing the rest of the milk. Don’t heat the eggs too quickly or you will  have scrambled eggs in your custard.

Place the pan over medium heat and whisk well, making sure you get in the corners of the pan, until it comes to a boil and thickens. Cool, cover and store in the fridge.


carolyn-washburnCarolyn Washburn is a family consumer sciences agent for Utah State University Extension. Her responsibilities include financial management education, food safety and nutrition, healthy family relations, emergency preparedness and working with youth. Her goal is to help individuals and families become self-sustaining and resilient by being financially prepared and healthy for any emergency. She serves on the National Disaster Education Network and has just completed the new food storage manual for USDA. Her most cherished award is America’s Promise, awarded by Colin Powell.


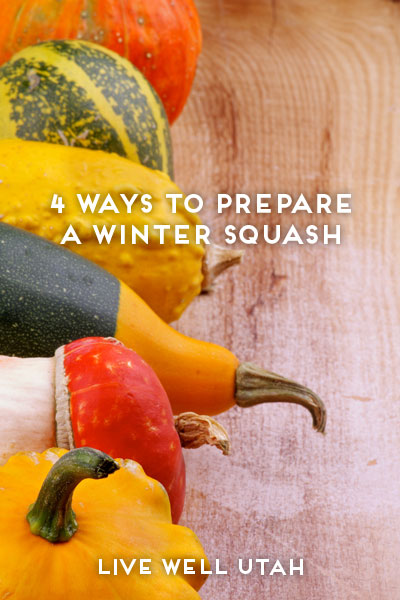
4 Ways to Prepare a Winter Squash for Dinner

Author – Nikki Capener

4 Ways to Prepare a Winter Squash | Live Well Utah

Fall is here, which means winter squash can be found in abundance. Whether you grew your own winter squash in your garden or picked one up at the local farmers market, farm stand or grocery store, there are many ways to prepare and enjoy it. Squash is a versatile ingredient that hides many nutrients in its sweet flavor and creamy texture. Winter squash is high in vitamins A and C and is a good source of vitamins B6, potassium and folate.

Here are a few preparation ideas:

  1. Bake It! Preheat your oven to 375 degrees. Begin by slicing your winter squash in half, then scrape away any seeds and stringy bits. Season you squash with your favorite spices or brown sugar and drizzle with olive oil or a small slice of butter. Place prepared squash in a baking dish and add a small amount of water to cover the bottom of the dish. Bake your squash between 45 minutes to an hour. Under-baked squash produces a chewy texture and over-baked squash becomes mushy. You will want your squash texture to fall somewhere in between; it should be easily pierced with a fork.
  2. Make soup! Simply bake the squash as described above but omit the seasoning and place the squash open side down. While the squash is baking, heat your favorite stock and spices over medium heat in a soup pot. Once squash has finished baking, scrape out the flesh. If you prefer chunky soup, use a potato masher to mash the flesh, or for a more pureed soup, use a blender or food processor to puree it. Add the mashed or pureed flesh to stock, stir and heat through. Serve with a dash of pepper and enjoy!
  3. Fry it! Slice squash in half and scrape away the seeds. Cut squash into small chunks and dip in a beaten egg. Once the squash is coated with egg mixture, dip squash in cornmeal or flour. Place oil or butter in a pan and fry squash over medium heat for about 6-7 minutes.
  4. Grill It! It isn’t too late to fire up the barbeque; grilled squash is simply divine. Cut your squash into large chunks, drizzle with olive oil, and season with your favorite spices. Place squash on the grill in indirect heat. You can also try squash kabobs, which make an excellent side dish. Cut squash into large chunks, dip into honey or melted butter, and place on the grill. Grilled squash is cooked through when it can be easily pierced with a fork.

Nikki Capener is a student at Utah State University studying family and consumer science education. She is the family and consumer sciences intern in Box Elder County and has loved working with the Extension faculty and 4-H youth. Her experience working with Extension has been incredibly beneficial; she has learned so much while working with Ann Henderson. Her hobbies include running, cooking, sewing and making crafts.


How To Guarantee Your Bread Will Rise | Baking 101

Author – Kathleen Riggs

Baking 101 | How To Guarantee Your Bread Will Rise | Live Well Utah

Unless you regularly bake bread, pastries or cookies, the leavening agents on your shelf (e.g., yeast, baking powder, baking soda) may not be fresh enough to make a high-quality baked product. While it is true these items don’t actually expire on the date indicated on the package, they do have a shelf life that needs to be taken into consideration.

It’s very satisfying to create yummy home-baked foods, and it only takes a minute to check to make sure leavening agents are fresh so you know your baking will be a success.

Leavening agents are used to cause a baked product to rise (increase in size). This happens when the leavening agent is combined with liquid to create carbon dioxide gas. It is the bubbles of gas trapped in the dough or batter that cause the baked product to rise or expand.

There are only a few of these agents used regularly in baking, and each basically works on the same principle. They all become activated with the addition of a warm liquid such as milk or water, or it may take mixing with a liquid acid such as vinegar, lemon juice, sour milk or buttermilk. Cream of tartar and tartaric acid (a key ingredient in baking powder) are examples of powdered acids.

In general, food storage experts say that baking soda will last up to 2 years on the shelf if stored in an air-tight container. Eighteen months is the storage time suggested for baking powder. Yeast, if kept dry and cool, generally stores for 1 year but it can be stored in a tightly sealed container in the freezer for up to an additional year.

However, the length of time these dry leavening agents will store depends on a few specific criteria such as freshness at time of purchase, temperature of storage space, type of container, humidity in the air and exposure to oxygen after opening.

On the package of baking powder and dry yeast, there will be a “best by” or “best if used by” date. Depending on the brand of baking soda purchased, it may have the same wording or it may actually indicate an expiration date. Remember that baking soda does not go “bad” overnight. It will have a gradual decline in performance just like the other leavening agents.

Cooler temperatures generally extend the shelf life of canned and packaged food goods. However, for leavening agents, if that location is in the basement, adjustments may need to be made to protect the leavening agents from humidity. If the basement generally smells musty, the leavening agents can be placed in air-tight jars, bags or containers for storage. The makers of Clabber Girl®, a company that manufactures baking powder, recommend that baking powder not be stored in the refrigerator or freezer. This is because condensation builds up in the can and may drop onto the baking powder, causing it to react and making it useless for baking. However, dry yeast can be stored in the freezer.

So, let’s say you look in the cupboard and all of the leavening agents you plan to use have passed the date recommended for use. How can you tell if they might still be usable? Here are some simple tests.

Baking powder is activated by a combination of heat and moisture. So to test it, mix 1 teaspoon of baking powder in a glass bowl or dish with 1/3 cup of hot tap water. If the baking powder is still good to use for baking, the mixture will produce lots of bubbles. Be sure to use warm or hot water for the test since cold water will not produce the same results.

When it comes to baking soda, heat is not required for it to be activated; just the addition of an ingredient considered to be acidic. Placing as little as 1/4 teaspoon of baking soda in a spoon or small dish and adding a few drops of vinegar or lemon juice should cause the baking soda to bubble vigorously. If the production of bubbles seems slow or not very active, it’s time to replace the box.

To test the freshness of dry yeast, the makers of RedStar® brand recommend using a 1-cup liquid measuring cup to dissolve 1 teaspoon of yeast in 1/2 cup warm tap water. It is recommended that a thermometer be used to make sure the water is between 110° F- 115° F. If you don’t have a thermometer, the tap water should be warm to the touch, not hot. In less than 4 minutes, the yeast mixture should have produced foam and raised to the 1-cup mark on the measuring cup and also have a rounded top – much like dough looks as it rises. If this happens, the yeast is considered very active. If the yeast did not rise to the 1-cup mark, the yeast has little or no activity and should be discarded.

kathleen-riggsKathleen Riggs is the Utah State University Extension family and consumer sciences professor for Iron County. She loves yard/garden work, where  her favorite tasks are weeding and mowing the lawn. Her favorite appliance is the microwave oven, and her specialty is microwave caramels. She  loves family time and occasions that bring everyone together from near or far.


Live Well Utah : Farmers Market Edition

Free Magazine | Live Well Utah Farmers Market Edition

Looking for some information on Utah Farmers Markets? Try the Live Well Utah’s Farmers Market Edition Magazine. You can pick one up free of charge at any Utah County Office or view it online here.

The publication is full of tips for planting a family garden, cooking vegetables, storing produce and preserving fresh produce. Also included is a harvest schedule and lots of delicious recipes.


Resource Roundup – Food $ense

have you used Food $ense? Plan, cook, eat, & recipes

Have you been over to the Food $ense website? It’s a wonderful website with tips on how to include your family in planning, cooking, and eating.

Be sure to check out these different areas:
Plan – Plan to Save, Plan a Menu, & Plan to Shop
Cook – Cooking Basics, Cooking Skills, & Cooking Safely
Eat – Eat Well, Eat Together, & Eat with the Kids
Recipes

What is Food $ense?
Food$ense is Utah’s Snap Ed Program. They provide nutrition education to low-income individuals and families throughout the state. Food$ense holds workshops throughout the state to promote healthy eating and active lifestyles among food stamp recipients and eligible.

Click here to learn more about Snap-Ed & Program.

Looking for more help with choosing what to eat? Also be sure to stop by ChooseMyPlate.gov for some great information!


Smooth Operator: 6 delicious treats to make with your blender!

Smooth Operator : 6 delicious treats to make with your blender!

Q. Why do kids like skateboards, roller blades, snow boards, slides and bikes so much?

A. Because they give such a smoooooth ride!

Did you know you can give your kids a pretty smooth ride right in your own kitchen? We’re not talking about sliding down a wet granite countertop. We’re talking about how they can be smooth operators with all the smooth concoctions they can create using a blender or food processor.

Ready to give it a whirl? Have them try out these six delicious treats made with a blender!

Kids can make great tasting and fun foods for breakfast, lunch, dinner and snacks. For instance a smoothie for breakfast is the perfect way to start the day. One great thing about a breakfast smoothie is that it can be made the night before and stored in the fridge. Then the next morning all they have to do is grab and go. Now that is even faster than a pop tart! The best part (except for how fabulous it tastes!) is that the smoothie is much better for their bodies.

What do a can of pinto beans and a blender have in common? Together they make one incredible bean dip or filling for a lunch burrito! All kids have to do is open the can of beans, rinse them off and throw them in the blender with a little salsa, chopped green onion and a dash or two of chili powder. It should be blended until everything is smooth and creamy and they will have the best bean dip or burrito filling around. They can put the pureed (blended up until it’s smooth) beans on a tortilla, top it with a little cheese if they would like, roll it up and pop it in the microwave for a minute or two. It’s faster to make a burrito at home than going through the drive-through and once again, it’s way more healthy than the burrito you buy.

Talking about smooth rides…how about Aladdin and his magic carpet? Kids may not be able to come up with a magic carpet for a smooth ride, but they can come up with one of Aladdin’s favorite smooth snacks – hummus! They can make their own hummus by putting a can of garbanzo beans, a little garlic, a teaspoon of cumin, a little salt and a tablespoon of olive oil in the blender or food processor. They can give it all a whirl until it’s smooth and creamy. Hummus is terrific with pita bread or pita chips. Yum!

Who doesn’t love that all-time favorite smooth treat – ice cream?! The problem with ice cream is that it tastes so good we want to eat lots of it but it really isn’t the healthiest treat we can eat because it is so full of fat and calories. And even though kids may think they don’t care too much about fat or calories, their body does care.

The good news is that with their new best friend, the blender, kids can make their own health-ified ice cream. They can put a frozen banana, a cup of strawberries, a drop or two of vanilla and a splash of milk in the blender or food processor and give it a whirl. They will have instant, good tasting, good-for-them ice cream. They can eat lots if they want because it’s just made of frozen fruit – no bad-for-the-body fat found here!

Do your kids hate onions or mushrooms or broccoli or just about any kind of veggie? The good news is that by blending up some of that stuff into soup or your favorite spaghetti sauce, they won’t even notice the taste or texture and they will be getting all those good-for-your-body veggies. You will both love it!

See how much fun being a smooth operator in the kitchen can be? Whether it’s for breakfast, lunch, dinner or snacks, smooth foods just can’t be beat. Just remind kids that, like playing it safe with smooth rides and using the right protective gear like helmets and knee pads, they need to play it safe in the kitchen too. Blenders and food processors can cause some serious damage and injuries if they don’t know what they are doing. Make sure you are around to help your kids learn to use blenders and food processors, and always have them ask permission before using any kitchen appliance!


And, be sure to try out our favorite:

Popeye Smoothie
6-8 ounces yogurt, any flavor
1/2 cup skim milk
1/2 fresh or frozen banana
1/2 cup fresh or frozen fruit
1 packed cup fresh spinach
Blend all ingredients well in a blender.
Yield: 1 big delicious smoothie

This is a smooth way to start the morning, and it may be made the night before and kept in the refrigerator.
Surprised to see spinach in this smoothie? Don’t worry, your kids won’t taste it at all and the spinach will give them that smooth boost they need to get going in the morning!


darlene_christensenheidi-leblancContributor: Debbie Christofferson, Heidi LeBlanc SNAP-Ed/Utah State University Food $ense


Savor the Flavors of Fresh Herbs and Spices

Author – Carolyn Washburn

Savor the Flavor. Ideas for cooking with herbs and spices.

Among the most tantalizing smells and flavors that come from your garden or kitchen emerge from fresh herbs and spices. These fragrant flavors add much to foods while helping cut back on fats, sugars and salts in recipes. Why not add some of the most used herbs and spices in your kitchen to your garden this year? You could plant fresh basil, oregano, mint and rosemary. These plants will add beauty to your garden and flavor to your foods.

An easy way to get started with herbs is container gardening. Maggie Wolf and Teresa Cerny wrote an article on herb container gardens. They list six ways to help your herbs be successful.

Choose herbs that grow in a compact habit. Herbs that are too tall can be out of scale with their container. While herbs that grow in a trailing matter can be a beautiful addition to your outside landscape, you’ll want to consider where to place your containers, how to care for them and harvesting the herbs too.

The handy Herb Container Gardens article has answers plus a useful chart listing many types of herbs, their maintenance and how to harvest.

Speaking of harvesting herbs, did you know it’s the oils from the leaves that give them their great aroma and flavor? You want these oils to be released during cooking, not during harvesting and storage. Exposure to light, overheating, bruising or cutting will release these oils before they are needed. Dennis Hinkamp references easy ways to harvest, dry, cook with and store your herbs in the article, Getting the Most out of your Herbs. The article says, “Of course the optimal way to use herbs is to pick them from the garden immediately before cooking. Since most recipes are written using proportions of dry herbs, when you substitute fresh herbs, you’ll need to add about three times as much as the original dry measure.”

Are you adding herbs to your garden this year? What are you some of your favorites to harvest and use?

Find additional articles on herbs and spices here.

carolyn-washburnCarolyn Washburn is a family consumer sciences agent for Utah State University Extension. Her responsibilities include financial management education, food safety and nutrition, healthy family relations, emergency preparedness and working with youth. Her goal is to help individuals and families become self-sustaining and resilient by being financially prepared and healthy for any emergency. She serves on the National Disaster Education Network and has just completed the new food storage manual for USDA. Her most cherished award is America’s Promise, awarded by Colin Powell.