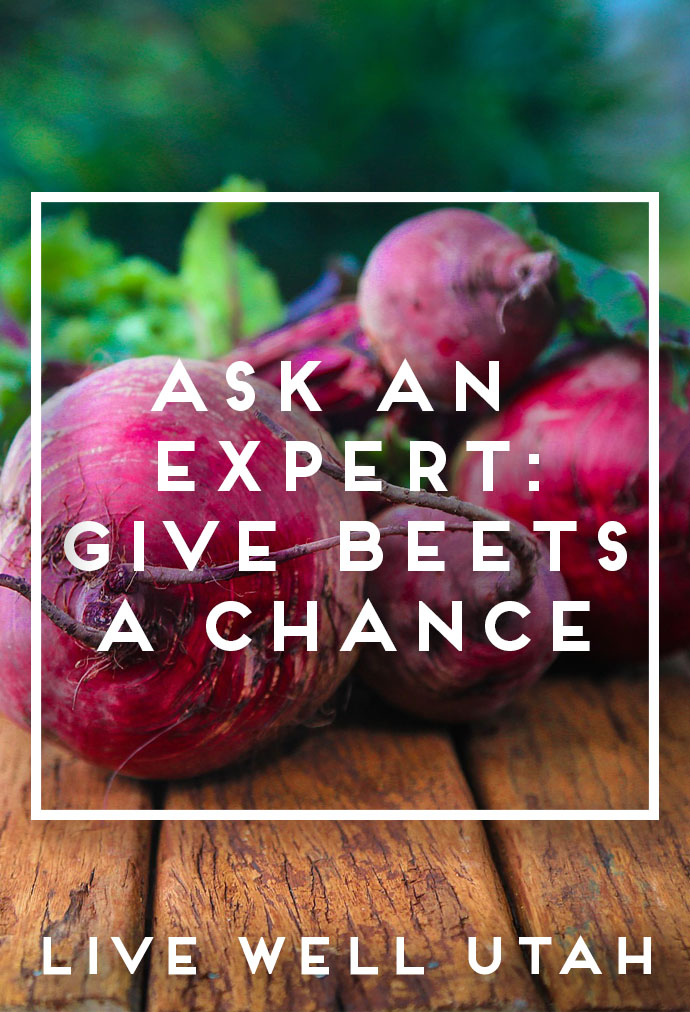
Ask an Expert // Give Beets a Chance

give-beets-a-chance


Take home some beautiful red beets next time you’re at the Farmers Market or grocery store. Read on to find out the many nutritional benefits of beets and get some tips on how to prepare them.


When it comes to eating beets, there are those who love them and those who… well, don’t.  If you are in the group of beet lovers then you probably already have a favorite way to prepare them and use them in side dishes or salads. Other readers may need some convincing before taking steps to include beets in their diet.

Good For You

One of the best reasons to develop a taste for these bright red root vegetables is because they are a good source of folate which helps in the manufacturing of red blood cells and other genetic cells throughout the body. Beets are also a good source of the mineral manganese needed for normal body growth and health. Calcium and potassium are other beneficial nutrients found in beets. Of course, Calcium is known to strengthen bones and teeth. Older adults also rely on the help of calcium-rich foods and supplements to ward off osteoporosis.  Potassium works to keep blood pressure low helping the heart to function efficiently.

Color and Texture

Another reason to use beets is because they add beautiful color and texture to salads. Before slicing or beets for a salad, the outer skin or peel must be removed. It can be removed while the beet is raw but it will be to your advantage to slip on food handler gloves to avoid staining the skin on your fingers. Most find it easier to roast or boil the beets before peeling.

Beet Greens

Don’t give in to the temptation to discard beet greens. Beet greens are actually grown for use in commercially-bagged salads. They can be exchanged for Swiss chard or spinach in your own creative salad. The reddish veins in the leaves break up all the shades of green normally found in salads. To preserve the crispness of home grown beet greens, they should be harvested, washed and refrigerated quickly in a breathable plastic bag and then used within the next two-three days. Beet greens are nearly ready for harvest is most parts of Utah. Start looking for them at local farmer’s markets if you don’t have any in your garden.

Beet greens are a great source of lutein, an antioxidant that helps protect the eyes from age-related macular degeneration and cataracts. The greens also contain a wide variety of phytochemicals that may help actually improve the health of your eyes and nerve tissues.

Preserve for Later

Maybe fresh beets aren’t appealing to your palate. If that is the case, perhaps consider the benefit of having preserved beets as part of your home food storage. Home canned beets are good to have on hand to cut or shred for soups, salads and other side dishes such as borscht and gazpacho.

For approved recipes to use for home preservation of beets, contact your local USU Extension Office or visit the National Center for Home Food Preservation. There you will find recipes for whole, cubed or sliced beets, as well as pickled beets.

More About Beets

  • The color of beet roots can range from dark purple to bright red, yellow, and white. When cut transversely, the roots show light and dark rings, sometimes alternating.
  • The Chioggia beet is red and white-striped, and nicknamed the “candy cane” beet.
  • Beet juice is widely used as a “natural” dye to give pink or red coloration to processed foods.
  • Beets have the highest sugar content of any vegetable.
  • Small beets (about a half-inch in diameter) are good for eating raw. Medium and large-sized beets are best for cooking. Very large beets (more than three inches in diameter) may be too woody for eating.

Kathleen Riggs is the Utah State University Extension family and consumer sciences professor for Iron County. Questions or comments may be sent to kathleen.riggs@usu.edu or call 435-586-8132.


Family Mealtime // Apple Cranberry Crisp

apple-crisp


Families who eat together have overall healthier diets, but that doesn’t mean that you can’t indulge in a sweet treat every now and then at end of your family meal. There are three healthy, delicious dessert recipes in the Live Well Utah Cookbook, Family Mealtime Edition. Today we’re sharing one of them- Apple Cranberry Crisp. This is a perfect dessert for autumn, as local apples are in season and abundant at farmers markets. 


Apple Cranberry Crisp

Filling

  • 5 cups apples, peeled and thinly sliced
  • 1 cup dried cranberries (or other dried fruit)
  • 1 teaspoon sugar
  • 1/2 teaspoon cinnamon

Topping

  • 1/2 cup quick cooking rolled oats
  • 2 tablespoons brown sugar
  • 2 tablespoons whole wheat flour
  • 1/2 teaspoon cinnamon
  • 1 tablespoon butter, melted

Preheat oven to 375 degrees Fahrenheit.

in a 2 quart baking dish, combine apples and cranberries. Sprinkle with sugar and cinnamon, and toss to coat.

In a small bowl, combine oats, brown sugar, flour, and cinnamon. Using a fork, cut butter into topping mixture until crumbly. Sprinkle topping evenly over apple filling. Bake for 30-35 minutes, or until apples are tender. Serve warm.


September is National Family Mealtime month. Each Friday this month we’ll be posting on that topic — specifically from the Live Well Utah Cookbook, Family Mealtime Edition. This publication is available for free at your local Extension office, or available digitally here. It features some great tips on the importance of family mealtime and meal planning, plus 21 quick, inexpensive, and nutritious recipes that are sure to please even the pickiest eaters. 


Dutch Oven 101

dutch-oven-101


Cooking in a Dutch oven can be fun, but you can’t just load your dirty Dutch oven into the dishwasher when the cooking is done. Follow these directions to properly clean and store your Dutch oven.


Dutch Oven 101: Cleaning

Clean  out food residue using cooking oil and paper towels. Add warm soapy water, and wash using a dish cloth or sponge with an abrasive back. Rinse and dry  Dutch oven thoroughly, and wipe off all surfaces with a paper towel to remove any remaining dirt, ash or water (including the bottom and the lid). Coat all surfaces of the oven with cooking oil, starting with the inside. Wipe off any excess oil, replace lid on Dutch oven, and store for the next use. If oil inside oven becomes rancid, wash it with warm soapy water and repeat directions above before using.

Dutch Oven Hummingbird Cake

This Southern cake is traditionally topped with cream cheese frosting and chopped pecans. Try this dutch oven version alongside vanilla or butter pecan ice cream.

3 cups flour
2 cups sugar
1 teaspoon salt
1 teaspoon baking soda
1 teaspoon cinnamon
3 eggs, beaten
1 1/4 cups water
1/2 cup vegetable oil
1 1/2 teaspoons vanilla
1 8-oz. can crushed pineapple
1 cup pecans, chopped
1 cup banana, mashed

Combine dry ingredients in large mixing bowl. Add eggs and oil, and mix until just moistened. Stir in remaining ingredients. Spread batter evenly in 12″ dutch oven that has been greased and coated with flour. Bake at 350 degrees fro 50-60 minutes (8-10 coals on bottom, 14-20 on top).

Farm to Table Dinner

Is your mouth watering for Dutch oven flavors? Come to the Farm to Table Dinner at the USU Botanical Center on September 15. Renowned Dutch oven chef Blaine Scott will prepare a delicious dinner of roast beef, cheesy potatoes and Mexican-style street corn. A seasonal fruit cobbler will be served to complete the meal. Save your place at the table and buy tickets here.

FarmtoTableFlyer-OY-Aug201622


Read more on Dutch oven cooking and find recipes here.


Ask an Expert // Shelf-life of Home Preserved Foods

shelf-life-graphic

You’ve had those bottled peaches from Grandma for two years now — are they still good? Are they safe? Find out just how long you can keep home-preserved foods in your pantry.


A common question at USU Extension offices usually goes something like this, “There was a good buy on boneless, skinless chicken breasts this week so I bought 40 lbs. and now I want to can it. How long will it stay good in the jar on the shelf?” Before answering this question for readers, let’s consider the following basic information about home food preservation.

Canning is an important, safe method of food preservation if practiced properly. Home food preservation generally involves placing foods in jars and heating them to a temperature that destroys microorganisms that could be a health hazard or cause the food to spoil. Processing times and temperatures are scientifically determined and must be followed exactly to assure not only quality but safety of these home preserved foods.

So, back to the question about shelf-life…. With the prevalence of emergency and disaster preparedness education, at least in Utah, families obviously want to build up their food storage for the proverbial “Rainy Day.” This is a good practice so long as it is also practical.

Many dry goods (wheat, sugar, dried beans, etc.) have an excellent shelf-life when stored in air-tight containers and are wonderful to have on hand as part of a basic food storage supply.

On the other hand, home preserved fruits, vegetables and meats should be treated differently. Instead of asking how long a home-preserved food will last, a better question is, “How much chicken will my family use in 1 to 2 years?”  When foods are preserved at home, it is true that families can control the quality of the food and to some degree how much additional sugar and salt are added. We cannot, however, duplicate the ultra-high temperatures or fast field-to-jar (or can) process commercial manufacturers use.

To ensure the home preserved food on pantry shelves are at ultimate quality, food should be rotated on a regular basis and not stock-piled for several years. After as few as two short years, foods will begin to darken or lose firmness. Does that mean they are no longer safe to eat? No. It does mean that the nutritional value is decreasing and will eventually be good to eat only for added calories. In other words, the food may fill you up but you won’t reap much in the way of vitamins or minerals.

A few additional tips for optimizing quality of home-preserved foods come as follows from the National Center for Home Food Preservation (nchfp.uga.edu ):


  • If lids are tightly vacuum sealed on cooled jars, remove screw bands, wash the lid and jar to remove food residue; then rinse and dry jars. Label and date the jars and store them in a clean, cool, dark, dry place. For best quality, store between 50 and 70 F. Can no more food than you will use within a year.
  • Do not store jars above 95 F or near hot pipes, a range, a furnace, in an uninsulated attic or in direct sunlight. Under these conditions, food will lose quality in a few weeks or months and may spoil. Dampness may corrode metal lids, break seals and allow recontamination and spoilage.
  • Accidental freezing of canned foods will not cause spoilage unless jars become unsealed and re-contaminated. However, freezing and thawing may soften food. If jars must be stored where they may freeze, wrap them in newspapers, place them in heavy cartons, and cover with more newspapers and blankets.


The satisfaction of having shelves full of high-quality foods preserved at home is nearly always seen as worth the time, money and effort by those who participate in home canning. Take the time to determine how much food is actually necessary and preserve only that much using tested and approved recipes. This will help minimize waste, offer nutritious foods and provide an on-going sense of self-reliance.


Kathleen Riggs is the Utah State University Extension Family and Consumer Sciences Professor for Iron County. Questions or comments may be sent to kathleen.riggs@usu.edu or call 435-586-8132.


Family Mealtime // How to Get Kids Involved

Getting Kids Involved

September is National Family Mealtime month. Each Friday this month we’ll be posting on that topic — specifically from the Live Well Utah Cookbook, Family Mealtime Edition. This publication is available for free at your local Extension office, or available digitally here. It features some great tips on the importance of family mealtime and meal planning, plus 21 quick, inexpensive, and nutritious recipes that are sure to please even the pickiest eaters. 


Getting Kids Involved

Involving children in meal planning and cooking at a young age is a great way to instill a love for delicious, homemade food! Here are some ideas on how to include kids of all ages in the kitchen. Remember to choose age appropriate jobs and keep safety in mind at all times.

Ages 2-5

Meal Planning:

  • Color coordinate fruits and vegetables
  • Circle foods they would like in store advertisements
  • Help cut coupons
  • Choose one meal they would like

Grocery Shopping:

  • Point out fruits and vegetables from the grocery list
  • Choose a new fruit or vegetable to try

Cooking:

  • Pour premeasured items into bowl to mix up
  • Tear up lettuce for a salad
  • Rinse off fruits and vegetables

Ages 6-10

Meal Planning:

  • Help make a list of meals they like
  • Look at USDA’s MyPlate diagram and come up with one meal following the diagram
  • Choose fruits and vegetables to put on the side of the main courses

Grocery Shopping:

  • Read the list to parent and cross items off as they are put in the cart
  • Choose a new fruit or vegetable to try

Cooking:

  • Measure ingredients and put them together with parent’s help
  • Toss a salad
  • Knead dough
  • Put together sandwiches

Ages 11-18

Meal Planning:

  • Look up three new recipes on social media
  • Create a 3-day menu using USDA’s MyPlate as a reference for a complete meal

Grocery Shopping:

  • Take a portion of the list and retrieve those items
  • If old enough to drive, do a small grocery trip on own
  • Keep track of the money saved each week

Cooking:

  • Run the show as head chef! Put together a full meal and recruit family members to help as needed


“Mom, What Can I Eat?” // Nutritious After-school Snack Ideas

Snack Ideas


All family members can benefit from planned healthy snacks.  Planned snacks provide more nutrition and energy for work, growth, learning and play.


Prep Your Pantry

Build a weekly snack menu and that “what is there to eat?” question won’t be heard as often.

Here are a few snack ideas that can add good nutrition to your family’s diet.

  • Fruits and berries
  • Low fat chips and salsa
  • Grape tomatoes and vegetables
  • Frozen banana chips
  • Low fat yogurt smoothies
  • Cereal mix
  • Whole grain crackers and breads
  • Applesauce and cottage cheese
  • Graham crackers
  • Mini pizza on English muffin or pita
  • Low fat cheese
  • Low fat pita and hummus
  • Fruit juice pops
  • Light popcorn
  • Ants on a log (stuffed celery)
  • Cheese sticks

Fruit Peanut Butter Pizza

1 pizza crust

1 cup peanut butter

3 sliced bananas

¾ cup raisins or dried cranberries

½ cup chopped apples


Bake crust according to package directions. Spread peanut butter on crust and add the fruits.  Bake at 350 until the peanut butter melts.


This article was written by Carolyn Washburn, Utah State University Extension associate professor, carolyn.washburn@usu.edu.


Ask an Expert // 7 Foods You Shouldn’t Can at Home

Canning Canning is a great way to preserve the bounty of summer, but beware! Not all foods are safe to can at home.


Did you know that the USDA has tested and approved many recipes to preserve foods at home? There are many foods you can bottle safely at home, as long as you follow USDA-endorsed recipes and procedures. Some unique foods include grapefruit and orange sections; cantaloupe pickles; pie fillings such as apple, mincemeat and green tomato; chicken, venison and fish; hot sauce and ketchup; a variety of soups and many more. See the USDA Complete Guide to Home Canning for recipes and procedures.

Have fun trying out a new safe, USDA-endorsed safe recipe in your kitchen this season. But remember, the possibilities are not quite endless.

Be aware that there are many foods that cannot be bottle safely at home. Why is that? One reason is that home kitchens are limited. A boiling water canner or a steam pressure canner can only get so hot. Heat is one element that is needed to kill micro-organisms that could spoil your food. A higher temperature needed for low-acid foods (like vegetables, beans and meat) is only achieved at home through a steam pressure canner.

Some foods or recipes have not been tested, or have been tested and have not been found to be safe. In some instances, the lack of approved canning recipe is due to poor quality.  Here is a list of some common foods that are not safe to can and not safe to consume.

Canning: Mixed Race Young Adult Woman Preserving Homegrown Fruit

What Not to Can at Home

Butter

That’s right, butter. In some emergency preparedness sections of stores, you might see canned butter in a tuna-fish size can. But don’t get too excited to go home and melt butter into a jar just to stick it on your food storage shelves. For now, canning butter using any method is not recommended. Some methods are dangerous, at best; others are not backed up by science. Why can butter when it freezes so easily?

Hydrated Wheat Kernels (aka wheat berries)

Wheat is a low-acid food that is susceptible to botulism if trapped in a low-acid, low-oxygen, room-temperature environment. In addition, the starch in wheat may interfere with the heat penetration during canning. Insufficient processing can result in botulism food poisoning. Instead of canning, store wheat dry until used, or if hydrated, refrigerate up to several days. You may also hydrate a batch and freeze in usable portions.

Quick Breads (e.g. banana, zucchini, pumpkin)

This idea likely started when people started baking quick breads in canning jars to create a nice round loaf. However, placing a lid and ring on the jar to create a vacuum seal as it cools does not kill botulism-forming organisms that grow in warm, moist, anaerobic conditions. These items should be either baked fresh and served or frozen.  Read more here.

Dried Beans (pinto, kidney, etc.)

To safely can dried beans, they must be hydrated first (usually 12 to 18 hours) and then brought to a boil for 30 min. Hot beans are then placed into hot jars for processing. It is not safe to put dry beans covered with water into a steam pressure canner for processing.

Fresh Homemade Salsa

There are many delicious salsa recipes to enjoy with your fresh garden produce, but these are not formulated for canning. Remember that canning recipes are scientifically studied to account for enough acid and/or processing time to keep the food safe. Fresh salsas are not formulated for canning. According to the National Center for Home Food Preservation’s Salsa bulletin, “Improperly canned salsas or other tomato-pepper combinations have been implicated in more than one outbreak of botulism poisoning.” Keep you and those consuming your salsas safe. Keep fresh salsas fresh, or freeze. Don’t experiment with canning your favorite fresh salsa. Find tips on canning salsas safely here.

Garlic, Vegetable or Herb-Flavored Oils

While these make beautiful gifts, infused oils have the potential to support the growth of C. botulinum bacteria, which grows into botulism food poisoning. These are best made fresh for use and not left at room temperature.

Pickled Eggs

There are NO home canning directions for pickled eggs. There are some recipes for storage in the refrigerator, but in order to avoid botulism, do not leave at room temperature, except for serving time, and do not attempt to bottle for food storage.


This article was written by Melanie Jewkes, Utah State University Extension associate professor, Salt Lake County

Source: https://extension.usu.edu/files/publications/publication/FN_Food_Preservation_2009-01.pdf


Garden Tomato Salsa

Salsa Graphic

Did you know Live Well Utah sends out a weekly newsletter? Each week we feature a list of quick tips, a recipe and an article — all sent directly to your inbox! Today we’re sharing a salsa recipe from a recent newsletter. If you like what you see, sign up to receive the newsletter here.


Summer is drawing to an end, but gardens are in full-swing production this time of year. If you find your countertops overflowing with red, ripe tomatoes, try this fresh salsa recipe to put them to good use. Don’t have your own garden tomatoes? Check out our Farmers Market Roundup to find local produce near you!


Garden Tomato Salsa


* 4-5 medium or large tomatoes

* 1/2 red onion

* 1 jalapeno

* 1 medium avocado

* 1 can corn

* 1 can black beans

* 1/2 bunch fresh cilantro

* juice of 2-3 limes

* salt to taste

 Finely dice tomatoes, onion, jalapeno and avocado, and add to a large bowl. Omit jalapeno ribs and seeds for milder salsa. Drain and rinse corn and beans, and add to bowl. Chop cilantro and add to bowl, along with lime juice and salt, to taste. Expert tip: use scissors to quickly snip up cilantro. Enjoy with chips, as a topping on chicken or fish, or on a southwestern-style salad.


Are you Being Mindful? // 5 Tips for Mindful Eating

Mindful Eating Graphic

Today’s post is from our sister blog, Eat Well Utah, all about how to eat mindfully and make better, healthier food choices. Bonus: there’s a recipe at the end for baked chicken tenders that parents and kids alike will enjoy.


Are you trying to eat healthier?  One of the best ways to stay on track is by eating mindfully.  It is not uncommon to  get caught up in the everyday stresses of life and forget to stop and live in the moment.  Mindful eating is simply being aware of what you are putting in your mouth and paying attention to how it affects your body, feelings, and mind.

This is a helpful practice for anyone who is focused on healthy eating or weight loss.  It makes you stop and think about not only what is going in your mouth, but why you are putting it there.  Are you really hungry?  Are you eating out of boredom?  Is it stress eating?  Mindful eating pulls you off autopilot and helps you be more attentive and aware of your food and drink choices.

Everyday distractions can make it difficult to stick to a mindful eating plan so it is important to set yourself up for success.  Nutrition 411 offers great tips on developing and sticking to your plan.  Here are some of my favorites:


1. Use a smaller plate.

Have you ever heard the term you eat with your eyes?  If you are hungry, you want to fill your plate with enough food to satisfy your hunger.  This can lead to overeating as you are tempted to quickly gobble up everything on your plate, missing your internal cues signaling that you are satisfied.  To prevent overeating, try using a smaller plate.  This will give you the ability to still fill up your plate, but the portion of food on your plate will be contained.

2. You eat what you see.

If you are feeling a bit hungry and you see a jar of candy on the countertop, it is likely that you will grab a piece of candy as a quick fix.  If you see a bowl of fresh fruit sitting on the counter top, it is likely you will reach for a nice, juicy apple.  Keeping healthy foods where you can see them, and tucking not-so-healthy foods away, helps you make better choices more often.  It is much easier to eat mindfully when unhealthy foods are out of sight and out of mind.

3. Serve from the stove.

Rather than bringing all the food to the table, keep it over by the stove or on the counter top.  The simple fact that you will have to get up to serve yourself another helping is likely to stop you from overindulging.  Bring fruits and veggies to the table instead.  If you are still hungry, you are more likely to refill you plate with what is right in front of you.

4. Remove distractions.

People tend to eat more when they are not paying attention to each bite that goes into their mouths.  When televisions, cell phones, and computers are holding your attention, you are more likely to miss your hunger cues.  You will overeat instead of stopping when you are satisfied.

5. Eat throughout the day.

You might feel the urge to skimp on meals early in the day so you can indulge in a larger meal in the evening.  Eating smaller meals more frequently helps keep your energy level more consistent and will help you avoid overeating when you feel like you are starving.


For more great tips on mindful eating click here and here.

What step will you take this week toward mindful eating?  Maybe you’ll start by making homemade chicken tenders instead of opting for the fast food version.

I was a bit skeptical when I first read through this recipe.  I thought for sure my kids would give it two thumbs down.  I was pleasantly surprised when they asked for seconds.  I hope your family is just as pleased.  Enjoy!

Click on the recipe card for a printable version.

DSC_9755

Chicken Tenders


This article was written by Candi Merritt, Certified Nutrition Education with Utah State University Extension. View original article on Eat Well Utah.


Ask an Expert: Three Ways to Prevent Wasted Food

Prevent Wasted Food Graphic

Don’t you hate it when you spend the time and money filling your fridge with delicious food, just to have it spoil before you get the chance to eat it? Try these three simple tips to use the food you buy and keep it from ending up in the garbage. 


The U.S. Environmental Protection Agency (EPA) is concerned about the amount of wasted food making its way from home garbage bins into landfills. The EPA website states: “About 95 percent of the food we throw away ends up in landfills or combustion facilities. In 2013, we disposed more than 35 million tons of food waste.” In addition, the U.S. Department of Agriculture reports that Americans waste over one-third of the vegetables and fruit purchased for home.

Granted, composting food scraps is not appealing to everyone nor is it practical for most apartment dwellers or residents in larger cities. However, learning to reduce waste can help make funds in the family budget available to meet other needs. To that end, EPA provides a few tips for helping families reduce wasted food through planning, storing and preparing food.

1. Planning

  • Keep a running list of ingredients for meals you know your family enjoys. That way, you can easily choose, shop for and prepare meals you know your family will eat.
  • Make your shopping list based on how many meals you’ll eat at home. Will you eat out this week? How often?
  • Plan your meals for the week before you go shopping and buy only the things needed for those meals.
  • Include quantities on your shopping list noting how many meals you’ll make with each item to avoid over-buying. For example: salad greens, enough for two lunches.
  • Look in your refrigerator and cupboards first to avoid buying food you already have, then make a list each week of what needs to be used and plan upcoming meals around it.
  • Keep in mind that buying in bulk only saves money if you are able to use the food before it spoils.

2. Storing

  • Freeze, preserve or can surplus fruits and vegetables, especially abundant seasonal produce. Visit your local USU Extension office or the National Center for Home Food Preservation (www.nchfp.uga.edu ) for guidance.
  • Many fruits give off natural gases as they ripen, making other nearby produce spoil faster. Store bananas, apples and tomatoes by themselves, and store fruits and vegetables in different bins.
  • Wait to wash berries until you are ready to eat them to prevent mold.
  • If you like to eat fruit at room temperature, but it should be stored in the refrigerator for maximum freshness, take what you’ll eat for the day out of the refrigerator in the morning.

3. Preparing

  • When you get home from the store, take the time to wash, dry, chop, dice, slice and place your fresh food items in clear storage containers for snacks and easy cooking.
  • Take advantage of your freezer:
    • Freeze foods such as bread, sliced fruit or meat that you know you won’t be able to eat before it spoils.
    • Cut your time in the kitchen by preparing and freezing meals ahead of time.
    • Prepare and cook perishable items, then freeze them for use throughout the month. For example, bake and freeze chicken breasts or fry and freeze taco meat.


Food in the United States is very affordable and takes only a small chunk out of most family budgets. However, mindless wasting of food should not become an acceptable norm. Pitching in by applying just a few of the above tips could go a long way in keeping food prices low, garbage pick-up prices affordable, landfills slower to be maximized and even make more food available to struggling families.


This article was written by Kathleen Riggs, Utah State University Extension family and consumer sciences professor, 435-586-8132, Kathleen.riggs@usu.edu