15 Benefits of Eating Local

Local Food Graphic

Some of the reasons to buy local food may surprise you. They may even entice you to visit your local farmer’s market this summer. 


Local is in. And if trends from the past several years are any indication, the movement is here to stay. Why are people so drawn to buying locally? The top three reasons Americans do so, according to the Food Marketing Institute, include freshness, supporting the local economy, and knowing where the product came from. Other studies show similar reasons, along with higher and better quality, positive relationships with growers, and the opportunity to purchase unique products.

Although many might first connect local food purchasing to positive environmental benefits, the benefits extend to your mental and physical health, your social sphere, and your community’s prosperity. Specific benefits of engaging in the local movement include:

  1. Improved nutrition, increased likelihood of making healthier food choices, obesity prevention, and reduced risk of diet-related chronic disease.
  2. Small farms preserved and rural communities sustained.
  3. Sixty-five percent of your dollar remains within the community, compared to shopping at large chain stores where only 40 percent of your dollar stays in your community.
  4. More job security in your local community.
  5. Attraction of employees and patients to local restaurants, hospitals, and other businesses advertising local food sourcing.
  6. Increased national food security.
  7. Local and small-scale farmland preserved.
  8. Food travel distance is reduced (food miles). This cuts down on fossil fuel consumption, air pollution, and greenhouse gas emissions associated with transporting food.
  9. Preserved cultivar genetic diversity.
  10. Higher likelihood farmers selling direct to consumers and markets are engaging in environmentally friendly production practices.
  11. Reduced food safety risks through product decentralization.
  12. If growing your own food, greater physical activity is an additional health benefit. 
  13. Being able to talk to the people who grew and/or made the food you are buying.
  14. Being able to ask questions about pesticides, herbicides, growth hormones, animal treatment, fertilizers, and any other queries you may have about how your food was produced.
  15. Getting to know your local producers gives you a stronger sense of place, relationships, trust, and pride within your community.

Read More

More Sustainable Food Resources 


This article was written by Roslyn Brain, Sustainable Communities Extension Specialist with USU Extension, Moab


Ask an Expert // How to Make Flaky Pie Crust

Pie CrustHaving guests over for dinner?  Need to use up the fruit on your counter?  Ready to wow your family and friends?  Try making a flaky, homemade pie crust and filling it with your favorite fruit or creamy filling.  If you’re overwhelmed with the thought of making your own pie crust, watch this video with Gaelynn Peterson, USU Extension Agent from Wayne County, and you’ll be an expert pie maker in  no time.


[youtube https://www.youtube.com/watch?v=WE9cx3JPilc?version=3&rel=1&showsearch=0&showinfo=1&iv_load_policy=1&fs=1&hl=en-US&autohide=2&wmode=transparent&w=863&h=486]


Whole Wheat Almond Toaster Waffles

Toaster WafflesConvenient and nutritious? It is possible with these tasty whole wheat toaster waffles. 


My mornings are always super busy, and it can be hard to fit in a nutritious breakfast. Recently I’ve been obsessed with making homemade toaster waffles. On Sunday morning I make a big batch of waffles, freeze what we don’t eat, and put the rest in the freezer. Then on weekdays, I grab one out, pop it in the toaster, and eat it on the run. Or, if I have a few minutes, I can sit and eat it with fresh fruit and syrup.

I love this recipe because it has a great nutty flavor and crisp, light texture. It really sticks with me! The whole-wheat flour means I am getting plenty of fiber and phytochemicals. The almond flour adds a wonderful nutty flavor, and some healthy fats, protein, and fiber.  I hope you will try and it and let me know what you think!

Almond Whole Wheat Toaster Waffles

Makes 6 small waffles or 3 large waffles

Ingredients:

  •      1 ½ cup whole wheat flour
  •      ½ cup almond flour
  •      1 teaspoon salt
  •      2 teaspoons baking powder
  •      2 tablespoons sugar
  •      2 large eggs
  •      1 ½ cup milk
  •      1/3 cup canola oil

Directions:

  1. In a large bowl, whisk together the dry ingredients (whole wheat flour, almond flour, salt, baking powder, and sugar).
  2. In a medium bowl, beat the two eggs, and then stir in the milk and oil.
  3. Add the wet mixture to the dry ingredients and stir just until combined. It is okay if it is a little lumpy, and you don’t want to stir too much or the waffles will be tough.
  4. Cook the waffles using a waffle iron, according to the manufacturer’s instructions.
  5. Freeze the waffles flat on a cookie sheet and then transfer to a Ziploc bag and put back in the freezer.

Notes:

You might need to experiment a little to figure out how much batter to use in your iron to make waffles that fit in your toaster. In my iron (it makes thin waffles), I use about ¼ cup of batter and this makes a waffle of the right diameter to fit in my toaster.

I find almond flour in the natural section of my grocery store. If you can’t find it, or it is too expensive, the waffles are really good without it too. If you leave out the almond flour, only use one egg.

This recipe is very flexible for people with food allergies or restrictions. Try using soy or almond milk instead of cows milk, substitute a gluten-free flour mixture for the whole wheat flour, or leave out the almond flour if you can’t have nuts (only use 1 egg if you leave out the almond flour).

Right after you pour the batter into your waffle iron but before you close the lid, you can sprinkle in some chopped pecans if you like a little extra crunch in your waffle.


This article was written by Carrie M. Durward, PhD, RD, Extension Nutrition Specialist and Assistant Professor 

Recipe adapted from King Arthur Flour


Ask An Expert // Six Tips for Portable Emergency Food Storage

emergency foodWhat would your family eat in an emergency? Get prepared with these six expert tips on portable emergency food storage.


Weather can regularly create emergency situations such as massive power outages, dangerous road conditions or flooding across the nation. In Utah, we are not without our share of emergency weather-caused situations that can leave people stranded, without heat or lights for several hours or stopped on the freeway due to a car accident.

While these situations can be frustrating at best, some can mean there will be no relief for up to 72 hours. How would you fare if you were home or in your car “stuck” with only what you have on hand to help you survive? Would you have sufficient supplies of food and water and a source of heat/warmth and other emergency items to last for 3 or more days?

If you are new to food storage and/or emergency preparedness, this question may be difficult to answer. However, even for those who think they are prepared, it’s good to review some basics and examine what goes in a 72-hour emergency kit.

Below are six tips for preparing your portable emergency supply, adapted from USU’s online publication, “A Guide to Food Storage for Emergencies.”

1. Foods to include in the 3-day/72-hour kit:

According to the Federal Emergency Management Agency (FEMA 2012), the general guidelines are to stock canned foods, dry mixes and other staples that do not require refrigeration, cooking, water or special preparation along with a manual can opener and eating utensils. Examples include:

  •  Ready-to-eat canned meats, fruits and vegetables
  • Protein or fruit bars
  • Dry cereal or granola
  • Peanut butter
  • Dried fruit
  • Nuts, chips or crackers
  • Food for infants
  • Powdered drink mixes to add to water
  • Comfort/stress foods, candy bars, etc.

2. Beverages to include in the 3-day/72-hour kit:

  • Bottled water
  • Soda or juices (Avoid diet sodas if possible since the artificial sweeteners break down and can cause an off flavor in soda stored beyond the expiration date. Regular soda will just taste flat.)
  • Non-perishable pasteurized milk (Sold in cartons; does not require refrigeration.)

3. How to store the 3-day/72-hour supply kit:

In case you are home and need to evacuate on short notice, these supplies should be stored in a convenient location close to a front door or garage. Use one or two portable containers. Consider a tote on wheels with a handle, backpacks, etc., that are easy to move. Be sure they will fit in your car and that they can be carried or pulled to a safe location if you need to leave the car.

4. Amount of water to include:

The recommendation is 1 gallon of water per person (adult) per day. However, the requirement for staying hydrated varies according to age, physical condition, activity, diet and climate. Bottled water is the easiest to store; whether it is purchased in individual serving sizes or larger containers such as 3-liter jugs. Again, consider how you will carry this with you.

5.  How to keep food cold or frozen at home:

If you experience a power outage that doesn’t require you to leave your home, make certain perishable foods remain useable for as long as possible. If you have enough warning or have extra space in the freezer, fill empty spaces with bagged blocks of ice or fill clean plastic containers/jugs with water and freeze. Food in the freezer may not stay completely frozen but will stay cold for 1-2 days. Foods in the refrigerator may fare better if they can be transferred into insulated ice chests and covered with cubed ice.

6. How to maintain emergency food storage:

It is not only important to obtain a 72-hour supply of food and water, but also to store it safely and rotate the food to keep it appetizing and safe to eat.

  • Keep the foods in a cool, dry place.
  • Store in tightly closed plastic or metal containers to protect from pests and to extend shelf life.
  • Throw out any canned goods that have become dented, show signs of corrosion or are bulging.
  • Use foods by their expiration/freshness dates and replace as necessary.
  • Rotate water storage annually.
  • Re-evaluate your food and water storage needs annually as families expand or get smaller in numbers.

The initial expense of time and money to establish a 3-day emergency food supply may seem daunting. However, once established, you can reduce the sense of fear, knowing you are prepared and can keep your family nourished during an emergency situation.


This article was written by Kathleen Riggs, Utah State University Extension professor, kathleen.riggs@usu.edu, 435-586-8132


Cranberry Orange Iced Oatmeal Cookies

Cranberry Orange CookiesFresh orange and dried cranberries add a zesty flavor to these chewy, whole wheat cookies.


Ingredients

  • 1/2 cup plus 6 T unsalted butter
  • 3/4 cup brown sugar, packed
  •  1/2 cup granulated sugar
  • 2 eggs
  • 1 t vanilla
  • 1 orange (for zest and juice)
  • 1 3/4 c whole wheat flour
  • 1 t baking soda
  • 1 t ground cinnamon
  • 1/2 t salt
  • 3 cups old fashioned oats
  • 1 cup dried cranberries*
  • 2 cups powdered sugar (for the icing)

Directions

Preheat oven to 350 degrees.

Cream together butter and sugars until light and fluffy. Add eggs, one at a time, and mix well. Add vanilla and zest from 3/4 of the orange. In a separate bowl, whisk together flour, baking soda, cinnamon, and salt. Add to butter/sugar/egg mixture, and mix until well combined. Stir in oats and dried cranberries.

Scoop dough onto prepared baking sheet (I like to use silicone baking mats or parchment paper), about 1-2 tablespoons of dough for each cookie. Bake for 8-10 minutes, or until golden. Allow cookies to cool on the pan for a few minutes before removing to a wire rack to cool completely.

While cookies cool, prepare the icing. Mix together powdered sugar, remaining orange zest, and juice from half the orange until smooth. Drizzle a generous amount of icing over cooled cookies, and allow to set.

*Commercially dried cranberries often have a good amount of added sugar. In this recipe I used home-dried cranberries with minimal sweetener added.


This article was written by Marta Nielsen, blog editor for Live Well Utah, marta.nielsen@usu.edu


How to have Themed Family Mealtime

themed mealtime.jpg


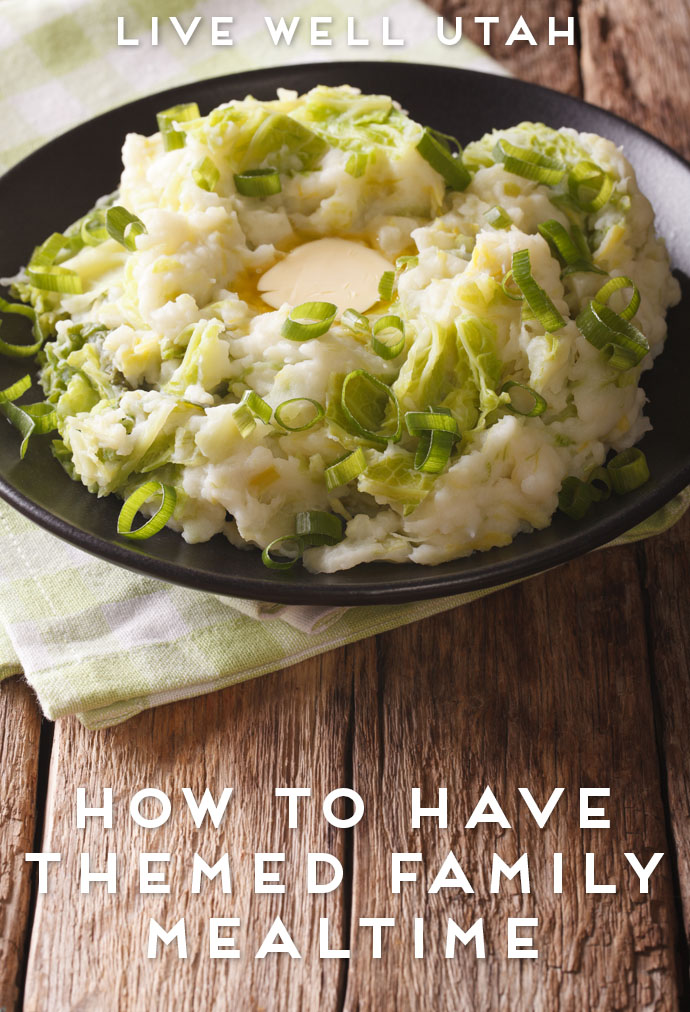
Enjoying a family meal is a great way for families to bond and create lifelong memories, however it is something that some families struggle to do five or more times a week. A themed family meal can get all family members involved and put a spin on an everyday, mundane event. Here are some fun ways to start having family mealtimes or if you already have family mealtimes, change up the routine!

1. Have one night a week dedicated to a theme, i.e. Taco Tuesday, Meatless Monday, Wok Wednesday, Western Wednesdays, etc.

2. Try adding decorations to your meal to really get your family involved. Put a red and white checkered tablecloth on the floor and have your own picnic inside (if weather permits go all out and have a picnic outside).

3. Highlight a holiday each month and have a meal centered around it. For example, cook green foods or traditional Irish cuisine for St. Patrick’s Day.

4. Travel the world by cooking traditional dishes from different countries. Add some fun facts from that country for interesting family table talk!

5. Make it a whole night. Dinner and a movie -have dinner, some movie theater treats, and then watch a movie together. Try tying your movie into your dinner theme, like fried chicken and What About Bob?, or spaghetti with Lady and the Tramp.

6. Your very own chopped! Provide three ingredients to family members and let them come up with a meal for the whole family with other ingredients in the kitchen.

This month try something new with your family. Here are a few recipes to kick start your own St. Patrick’s Day themed dinner— or you could go with the classic corned beef and cabbage!

Irish Stew

  • 2 lbs stewing steak cut into small pieces
  • 8 large potatoes, diced
  • 4 to 6 large carrots, diced
  • 2 large onions, diced
  • Salt and pepper to taste

Brown beef and add to stewing pot or slow cooker along with juices. Add potatoes, salt and pepper, and 4 quarts water (more or less, as desired). Bring to a boil. Add carrots and onions. Simmer on low for 1 to 2 hours until potatoes can be pierced with a fork.

Optional variations: Add 1 to 2 cups of diced celery with carrots and onions. Add 1 to 2 tsp of dried thyme with potatoes. Use beef broth in place of water. If desired, you can add a little flour mixed with water (a roux) to the simmering soup about 20 – 30 minutes before serving to thicken broth, but traditionally, it is a fairly thin soup.

Recipe Source

Irish Soda Bread

Ingredients:

  • 4 Cups all-purpose flour
  • 4 tablespoons white sugar
  • 1 tablespoon baking powder
  • ½ teaspoon salt
  • ½ Cup butter, softened
  • 1 Cup buttermilk
  • 1 egg
  • ¼ Cup butter, melted
  • ¼ Cup buttermilk

Directions:

1. Preheat oven to 375 degrees F (190 degrees C). Lightly grease a large baking sheet.

2. In a large bowl, mix together flour, sugar, baking soda, baking powder, salt and softened butter. Stir in 1 cup of buttermilk and egg. Turn dough out onto a lightly floured surface and knead slightly. Form dough into a round and place on prepared baking sheet. In a small bowl, combine melted butter with 1/4 cup buttermilk; brush loaf with this mixture. Use a sharp knife to cut an ‘X’ into the top of the loaf.

3. Bake in preheated oven until a toothpick inserted into the center of the loaf comes out clean, 45 to 50 minutes. Check for doneness after 30 minutes. You may continue to brush the loaf with the butter mixture while it bakes.

Colcannon (Irish Potatoes and Cabbage)

  • 6 medium potatoes, washed, peeled (optional) and quartered
  • 2 cups grated cabbage
  • 4 tablespoons butter
  • ½ teaspoon salt
  • ⅛ teaspoon pepper
  • 2 stems of green onion, chopped

Add potatoes to a large pot of boiling, salted water, and cook until tender, about 20 – 25 minutes. When the potatoes have cooked 15 minutes, add the cabbage and continue boiling until the potatoes are fork tender. Right before draining the potatoes and cabbage, add the chopped green onion and cook for one minute. Drain the potatoes and mash them. Add the milk and butter. Adjust milk if potatoes are too dry.

Recipe Source

Key Lime Meringue Pie

One baked 9-inch pie crust of your choice

Key Lime Curd:

  • Finely grated zest from 4 limes
  • ⅓ cup lime juice
  • ½ cup granulated sugar
  • 3 large eggs
  • 3 large egg yolks
  • ¼ teaspoon salt
  • 8 tablespoons unsalted butter, cut into small pieces
  • 1 cup heavy whipping cream
  • Green food coloring, if desired.

In top of double boiler, whisk lime zest, lime juice, sugar, eggs, egg yolks and salt. Whisk constantly until the mixture becomes thick, about 12 to 15 minutes. Remove from heat and whisk in butter one piece at a time until smooth. Add a few drops of food coloring for a brighter green, if desired. Strain curd through a fine-mesh sieve into another bowl. Line the surface of the curd with plastic wrap and chill in the fridge for about 30 minutes. Whip cream to soft peaks and fold into the chilled curd. Pour into completely cooled pie crust.

Meringue:

  • Egg whites from 4 large eggs
  • ⅔ cup granulated sugar
  • ¼ cup powdered sugar
  • 1 teaspoon vanilla extract
  • ¼ teaspoon salt

Preheat oven to 375° F with the rack positioned about 8-inches from the top of the oven. Beat egg whites for about 5 minutes and gradually add granulated and powdered sugars in a slow and steady stream. Add vanilla and salt. Increase the speed and beat for about 10 minutes or until the meringue becomes very thick.

Spread the meringue over the curd and cover up to the edges of the curd and crust. Swirl and create peaks using a spatula. Place pie plate on a baking sheet and bake for 10 to 12 minutes, rotating it halfway through the baking time. Meringue peaks should be a beautiful light golden brown with white “valleys”. Completely cool pie on a wire rack before chilling in the fridge for at least an hour before serving. Best served the same day it is made.

Recipe Source 


By: Jaqueline Neid-Avila, RDN, CD Extension Nutrition Assistant Professor


Put Your Best Fork Forward!

National Nutrition Month 2017

You can make healthier food choices for yourself and your family. Take the leap this month to celebrate National Nutrition Month, and try to decrease the amount of added sugar in your diet.


March is National Nutrition Month and now is the time to go back to the basics of healthy eating. “Put Your Best Fork Forward” is the theme for National Nutrition Month 2017 and reminds us that we each have the tools to help us make healthier food choices. One way make to put your best fork forward this month is to reduce the amount of added sugar you consume. Added sugars have not only been linked to higher dental cavities but also type 2 diabetes, heart disease, and obesity.

Here are some tips to reduce the amount of added sugars you and your family consume:

  1. Check food labels and avoid foods with added sweeteners. Instead, fill your grocery cart with naturally sweet foods like fruits and vegetables (think bell peppers, carrots, and sugar snap peas). 
  2. Avoid high sugar beverages and drink beverages like milk and water instead.
  3. Cook from scratch. Try making your own granola or homemade baked goods. By cooking from scratch you are more in control of the ingredients and amount of added sugar. For example, try chocolate avocado frosting on your favorite cupcakes or brownies  for a low sugar recipe that uses a healthy fat (recipe below).
  4. Ditch the sweetened yogurt— a common source of added sugars. Eat plain yogurt flavored with naturally sweet fruit. You can also try mixing half flavored yogurt with plain, unsweetened yogurt. This will allow for you and your family to adjust your taste buds, eventually using less sweetened varieties.
  5. Develop a healthy relationship with food instead of focusing on completely removing sugar. Save the sweet treats for special occasions!

Chocolate Avocado Frosting

  •      2 very ripe avocados
  •      ¼ cup chopped baking chocolate (around 65% cacao)
  •      ¼ cup unsweetened cocoa powder
  •      ¼ cup agave
  •      1 teaspoon vanilla
  •      ¼ cup almond milk/soy milk
  •   pinch of salt

Instruction

Melt the baking chocolate in the microwave (careful not to burn it). Let it cool slightly. In a food processor mix all ingredients together. Taste and adjust. Let chill in the fridge for at least 15 or so minutes.


This article was written by Jaqueline Neid- Avila, RDN, CD, Nutrition Faculty


Fresh Take on Salad: Look Beyond the Lettuce

Fresh take on salad.jpgDid you resolve to eat more vegetables this year? Check out these fresh salad recipes from Eat Well Utah!


10 Tips for Better Tasting Fresh Produce

vegetable-taste
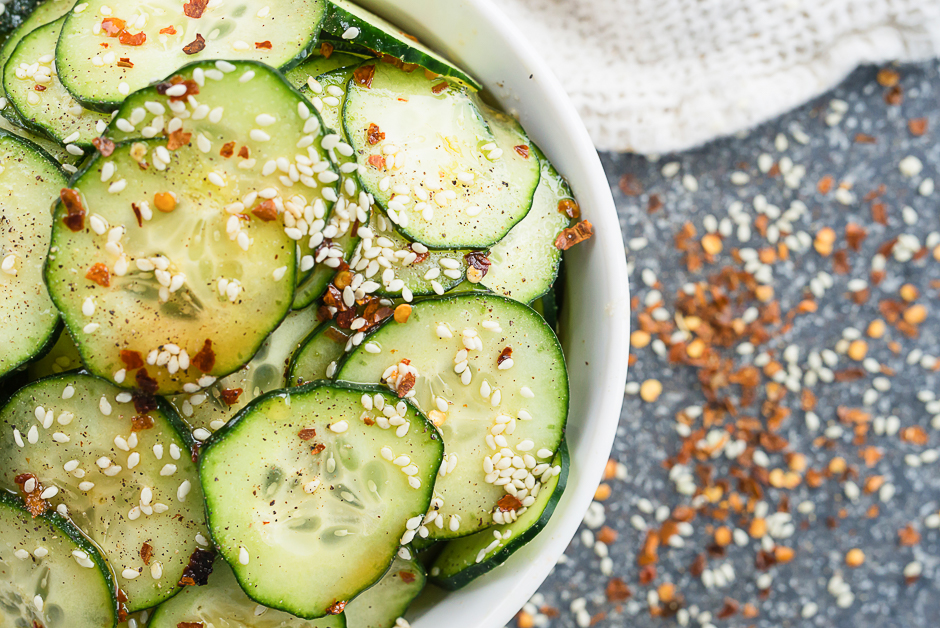
How do you like your vegetables? If you’re looking for some delicious ways to get your family to eat more fruits and veggies, look no further!  We’ve got ten tips to help you pump up the flavor of your fresh produce.


We all know that fruits and vegetables are an important part of a healthy diet. We’ve learned ways to make them less expensive and more convenient, but what if you or your family members just don’t like the taste? This week we offer 10 tips to help everyone learn to love the taste of fruits and vegetables.

  1. Try fresh fruits or vegetables with a healthy dip or dressing. Try hummus, salad dressing or yogurt.
  2. Increase the amount of vegetables in flavorful, well-liked foods. Try extra tomatoes and beans in chili, carrots in tomato sauce, broccoli mixed into mac and cheese and peas in minestrone soup.
  3. Add shredded carrots or zucchini to meatloaf, casseroles and quick breads.
  4. Try eating your vegetables first, when you are most hungry. Things really do taste better when you are hungry! Put out fresh vegetables with dip before dinner, or start the meal with a salad or vegetable soup.
  5. Shop in season—fruits and vegetables that are in season taste better. Think of a wonderful tomato from the garden in summer vs. the ones you can buy from the store in January. Farmers markets, roadside stands and your local grocery store are great places to get seasonal produce.
  6. Try preparing vegetables in different ways: raw, steamed, roasted, etc. The flavor and texture can be very different, depending on how you cook them. If you don’t like them one way, you might like them another!
  7. I especially recommend roasting or grilling vegetables. You get wonderfully sweet vegetables that are soft and creamy on the inside and crisp on the outside.
  8. Make eating vegetables fun by playing with your food. Try ants on a log, rainbow salad or pizza faces.
  9. Use a small amount of sugar when cooking bitter vegetables like kale or Brussels sprouts. This will help you become more familiar with the taste of vegetables, and you will learn to like the flavor more, even without the sugar!
  10. Just keep trying! We tend to like foods that we eat often or have at least tried multiple times. If you don’t like the taste of a vegetable today, it doesn’t mean you won’t like it the next time you try it!

This article was written by Carrie Durward, Extension Nutrition Specialist


How to Eat More Fresh Produce // 10 Easy-Peasy Tips

eat-more-veggiesLooking for some easy ways to eat more veggies and fruits? We have 10 tips to help you do just that.


In the last article, we learned about ways to make fruits and vegetables part of your diet on a budget. This is important, because fruits and vegetables are full of essential vitamins and minerals. They are also low in calories, but they have lots of fiber and water. This means that when we eat fruits and vegetables, they fill our stomachs, but don’t add a lot of calories. Besides cost, another reason people often don’t get enough fruits and vegetables is time or convenience. Read on for 10 tips to make eating fruits and vegetables fit into your busy lifestyle:

  1. Keep frozen fruits and vegetables on hand. They have the same amount of nutrition as fresh, and they are all ready to go—no cleaning or chopping needed!
  2. Cook fresh or frozen vegetables in the microwave with a little water for a quick side dish.
  3. Make extra vegetable soup and freeze it for days when you don’t have time to cook. Then just defrost in the microwave.
  4. Don’t have time to defrost soup? Open a can of low-sodium soup, add a bag of frozen veggies and serve as soon as it is warm.
  5. Plan ahead—clean and chop fresh vegetables when you have time so they are ready to go. Then you can use them in recipes, eat them with dip or add them to a salad or wrap. Just be aware that chopped veggies may go bad faster, but most chopped veggies will keep for a few days or a week.
  6. Pre-package those chopped veggies in small bags, and then you have an instant snack ready to grab on the way out the door. Think beyond carrot and celery sticks—try bell peppers, cucumbers, broccoli, cauliflower and zucchini slices.
  7. Fruits like oranges, apples and bananas make great food on the go without any additional work from you.
  8. Just like with the vegetables, you can also clean and chop fruit ahead of time. I like to do this with berries, melons and stone fruits like peaches. Add a little lemon juice to sliced fruit, and package them in small containers so they don’t get squashed in your purse or bag.
  9. Dried fruit makes a great on-the-go snack, and since it keeps for a long time, you can stash some in your car, desk or bag for when you are hungry and don’t have a snack packed. Just make sure you stick to the portion size—you only need ¼ cup.
  10. Fruits and vegetables can also be a great part of a quick breakfast—try fresh fruit on your cereal, or pack fresh fruit, yogurt and granola in a container or glass jar for breakfast on the go. Most people don’t think of vegetables at breakfast, but many vegetables are great with eggs in an omelet, scrambled or even just on the side. My favorite is avocado and salsa!

This article was written by Carrie Durward, Extension Nutrition Specialist