How To Guarantee Your Bread Will Rise | Baking 101

Author – Kathleen Riggs

Baking 101 | How To Guarantee Your Bread Will Rise | Live Well Utah

Unless you regularly bake bread, pastries or cookies, the leavening agents on your shelf (e.g., yeast, baking powder, baking soda) may not be fresh enough to make a high-quality baked product. While it is true these items don’t actually expire on the date indicated on the package, they do have a shelf life that needs to be taken into consideration.

It’s very satisfying to create yummy home-baked foods, and it only takes a minute to check to make sure leavening agents are fresh so you know your baking will be a success.

Leavening agents are used to cause a baked product to rise (increase in size). This happens when the leavening agent is combined with liquid to create carbon dioxide gas. It is the bubbles of gas trapped in the dough or batter that cause the baked product to rise or expand.

There are only a few of these agents used regularly in baking, and each basically works on the same principle. They all become activated with the addition of a warm liquid such as milk or water, or it may take mixing with a liquid acid such as vinegar, lemon juice, sour milk or buttermilk. Cream of tartar and tartaric acid (a key ingredient in baking powder) are examples of powdered acids.

In general, food storage experts say that baking soda will last up to 2 years on the shelf if stored in an air-tight container. Eighteen months is the storage time suggested for baking powder. Yeast, if kept dry and cool, generally stores for 1 year but it can be stored in a tightly sealed container in the freezer for up to an additional year.

However, the length of time these dry leavening agents will store depends on a few specific criteria such as freshness at time of purchase, temperature of storage space, type of container, humidity in the air and exposure to oxygen after opening.

On the package of baking powder and dry yeast, there will be a “best by” or “best if used by” date. Depending on the brand of baking soda purchased, it may have the same wording or it may actually indicate an expiration date. Remember that baking soda does not go “bad” overnight. It will have a gradual decline in performance just like the other leavening agents.

Cooler temperatures generally extend the shelf life of canned and packaged food goods. However, for leavening agents, if that location is in the basement, adjustments may need to be made to protect the leavening agents from humidity. If the basement generally smells musty, the leavening agents can be placed in air-tight jars, bags or containers for storage. The makers of Clabber Girl®, a company that manufactures baking powder, recommend that baking powder not be stored in the refrigerator or freezer. This is because condensation builds up in the can and may drop onto the baking powder, causing it to react and making it useless for baking. However, dry yeast can be stored in the freezer.

So, let’s say you look in the cupboard and all of the leavening agents you plan to use have passed the date recommended for use. How can you tell if they might still be usable? Here are some simple tests.

Baking powder is activated by a combination of heat and moisture. So to test it, mix 1 teaspoon of baking powder in a glass bowl or dish with 1/3 cup of hot tap water. If the baking powder is still good to use for baking, the mixture will produce lots of bubbles. Be sure to use warm or hot water for the test since cold water will not produce the same results.

When it comes to baking soda, heat is not required for it to be activated; just the addition of an ingredient considered to be acidic. Placing as little as 1/4 teaspoon of baking soda in a spoon or small dish and adding a few drops of vinegar or lemon juice should cause the baking soda to bubble vigorously. If the production of bubbles seems slow or not very active, it’s time to replace the box.

To test the freshness of dry yeast, the makers of RedStar® brand recommend using a 1-cup liquid measuring cup to dissolve 1 teaspoon of yeast in 1/2 cup warm tap water. It is recommended that a thermometer be used to make sure the water is between 110° F- 115° F. If you don’t have a thermometer, the tap water should be warm to the touch, not hot. In less than 4 minutes, the yeast mixture should have produced foam and raised to the 1-cup mark on the measuring cup and also have a rounded top – much like dough looks as it rises. If this happens, the yeast is considered very active. If the yeast did not rise to the 1-cup mark, the yeast has little or no activity and should be discarded.

kathleen-riggsKathleen Riggs is the Utah State University Extension family and consumer sciences professor for Iron County. She loves yard/garden work, where  her favorite tasks are weeding and mowing the lawn. Her favorite appliance is the microwave oven, and her specialty is microwave caramels. She  loves family time and occasions that bring everyone together from near or far.


Top 10 Ways to Help Your Child Eat More Vegetables

Author – Carrie M. Durward PhD, RD

10 Ways to Help Your Child Eat More Vegetables | Live Well Utah

As a registered dietitian, one of the most common questions I get from parents is how to get their child to eat vegetables. Luckily for me, nutrition research has given us a lot of great information about how to do this.

First and most important: if you want your child to like and eat vegetables, offer them early and often! Feed your child a variety of fruit and vegetable purees as soon as you introduce solid food (5 to 7 months). This is a time period when children are more open to trying new foods, so it is a great time to have them learn the flavors of many different vegetables.

However, if you missed this window, it isn’t too late! We like and eat the foods we are familiar with. The best way to get your children to like vegetables is to keep offering them. In one study, children had to taste a new vegetable up to 15 times before it was accepted.

It is normal for young children to be wary of new foods. If your child rejects a new vegetable or refuses to try it, don’t give up! Just try again another day.

Try to avoid showing a negative reaction like frustration if you child refuses vegetables. Never pressure your children to finish food or force them to clean their plate. Encourage them to try a bite, but don’t force it!

Instead, try one of these 10 positive ways to help your child try new vegetables.

Top 10 Ways to Help your Child Eat More Vegetables

  1. Be a good example. Keep vegetables in the house, serve them at every meal and let your child see you eating and enjoying them.
  2. Offer vegetables first, when children are hungry. Try vegetables as an after school snack or have a salad or soup at the beginning of dinner.
  3. Take your child shopping and let him or her pick out the vegetables, or let your child choose between two different vegetables to have with dinner.
  4. Get your children involved in the cooking. If children help prepare a vegetable, they will be more likely to try it.
  5. Grow a vegetable garden or visit a farmers market or local farm. These can be fun ways to help your child explore new foods.
  6. Make eating vegetables fun by playing with your food. Try ants on a log, rainbow salad or pizza faces.
  7. Try preparing vegetables in different ways: raw, steamed, roasted, etc. The flavor and texture can be very different, depending on how you cook them. If your child doesn’t like vegetables one way, he or she might like them another way!
  8. Try a small reward, like a sticker or praise to help convince your child to taste vegetables. Don’t use food as a reward or punishment.
  9. Use marketing in your favor. Put stickers of your child’s favorite book or TV characters on containers of vegetables to encourage intake.
  10. Offer vegetables with a low-calorie dip, or use a small amount of sugar when cooking to help your child be more willing to taste and eat vegetables. This will help your children become more familiar with the taste of vegetables, and they will learn to like the flavor more, even without the dip or sugar!

carrie-durwardCarrie Durward PhD, RD is an Assistant Professor of Nutrition and Extension Nutrition Specialist at Utah State University. Carrie is a Registered Dietitian and holds her doctorate in Nutritional Sciences from the Pennsylvania State University and her Bachelor of Science in Human Nutrition from Arizona State University. Carrie has expertise in obesity and health, weight loss, and nutrition behavior change. Her research interests include promotion of vegetable intake and weight bias prevention. When she isn’t working, Carrie loves to garden, spend time outdoors, and cook and eat delicious food.


Live Well Utah : Farmers Market Edition

Free Magazine | Live Well Utah Farmers Market Edition

Looking for some information on Utah Farmers Markets? Try the Live Well Utah’s Farmers Market Edition Magazine. You can pick one up free of charge at any Utah County Office or view it online here.

The publication is full of tips for planting a family garden, cooking vegetables, storing produce and preserving fresh produce. Also included is a harvest schedule and lots of delicious recipes.


Resource Roundup – Food $ense

have you used Food $ense? Plan, cook, eat, & recipes

Have you been over to the Food $ense website? It’s a wonderful website with tips on how to include your family in planning, cooking, and eating.

Be sure to check out these different areas:
Plan – Plan to Save, Plan a Menu, & Plan to Shop
Cook – Cooking Basics, Cooking Skills, & Cooking Safely
Eat – Eat Well, Eat Together, & Eat with the Kids
Recipes

What is Food $ense?
Food$ense is Utah’s Snap Ed Program. They provide nutrition education to low-income individuals and families throughout the state. Food$ense holds workshops throughout the state to promote healthy eating and active lifestyles among food stamp recipients and eligible.

Click here to learn more about Snap-Ed & Program.

Looking for more help with choosing what to eat? Also be sure to stop by ChooseMyPlate.gov for some great information!


Smooth Operator: 6 delicious treats to make with your blender!

Smooth Operator : 6 delicious treats to make with your blender!

Q. Why do kids like skateboards, roller blades, snow boards, slides and bikes so much?

A. Because they give such a smoooooth ride!

Did you know you can give your kids a pretty smooth ride right in your own kitchen? We’re not talking about sliding down a wet granite countertop. We’re talking about how they can be smooth operators with all the smooth concoctions they can create using a blender or food processor.

Ready to give it a whirl? Have them try out these six delicious treats made with a blender!

Kids can make great tasting and fun foods for breakfast, lunch, dinner and snacks. For instance a smoothie for breakfast is the perfect way to start the day. One great thing about a breakfast smoothie is that it can be made the night before and stored in the fridge. Then the next morning all they have to do is grab and go. Now that is even faster than a pop tart! The best part (except for how fabulous it tastes!) is that the smoothie is much better for their bodies.

What do a can of pinto beans and a blender have in common? Together they make one incredible bean dip or filling for a lunch burrito! All kids have to do is open the can of beans, rinse them off and throw them in the blender with a little salsa, chopped green onion and a dash or two of chili powder. It should be blended until everything is smooth and creamy and they will have the best bean dip or burrito filling around. They can put the pureed (blended up until it’s smooth) beans on a tortilla, top it with a little cheese if they would like, roll it up and pop it in the microwave for a minute or two. It’s faster to make a burrito at home than going through the drive-through and once again, it’s way more healthy than the burrito you buy.

Talking about smooth rides…how about Aladdin and his magic carpet? Kids may not be able to come up with a magic carpet for a smooth ride, but they can come up with one of Aladdin’s favorite smooth snacks – hummus! They can make their own hummus by putting a can of garbanzo beans, a little garlic, a teaspoon of cumin, a little salt and a tablespoon of olive oil in the blender or food processor. They can give it all a whirl until it’s smooth and creamy. Hummus is terrific with pita bread or pita chips. Yum!

Who doesn’t love that all-time favorite smooth treat – ice cream?! The problem with ice cream is that it tastes so good we want to eat lots of it but it really isn’t the healthiest treat we can eat because it is so full of fat and calories. And even though kids may think they don’t care too much about fat or calories, their body does care.

The good news is that with their new best friend, the blender, kids can make their own health-ified ice cream. They can put a frozen banana, a cup of strawberries, a drop or two of vanilla and a splash of milk in the blender or food processor and give it a whirl. They will have instant, good tasting, good-for-them ice cream. They can eat lots if they want because it’s just made of frozen fruit – no bad-for-the-body fat found here!

Do your kids hate onions or mushrooms or broccoli or just about any kind of veggie? The good news is that by blending up some of that stuff into soup or your favorite spaghetti sauce, they won’t even notice the taste or texture and they will be getting all those good-for-your-body veggies. You will both love it!

See how much fun being a smooth operator in the kitchen can be? Whether it’s for breakfast, lunch, dinner or snacks, smooth foods just can’t be beat. Just remind kids that, like playing it safe with smooth rides and using the right protective gear like helmets and knee pads, they need to play it safe in the kitchen too. Blenders and food processors can cause some serious damage and injuries if they don’t know what they are doing. Make sure you are around to help your kids learn to use blenders and food processors, and always have them ask permission before using any kitchen appliance!


And, be sure to try out our favorite:

Popeye Smoothie
6-8 ounces yogurt, any flavor
1/2 cup skim milk
1/2 fresh or frozen banana
1/2 cup fresh or frozen fruit
1 packed cup fresh spinach
Blend all ingredients well in a blender.
Yield: 1 big delicious smoothie

This is a smooth way to start the morning, and it may be made the night before and kept in the refrigerator.
Surprised to see spinach in this smoothie? Don’t worry, your kids won’t taste it at all and the spinach will give them that smooth boost they need to get going in the morning!


darlene_christensenheidi-leblancContributor: Debbie Christofferson, Heidi LeBlanc SNAP-Ed/Utah State University Food $ense


4 Tips and Reminders for Harvest Preservation

Author – SuzAnne Jorgensen

4 tips and reminders for harvest preservation

The golden leaves and the beginning of cooler weather remind us that it is once again harvest season. Whether you are preserving end-of-the-season garden items or canning deer or other game meats, it is important to follow safe canning principles.

Remember to adjust for altitude. Many recipes are written for sea level with a reminder of altitude adjustment in the beginning of the recipe book. For pressure canning in higher altitudes, the pressure is generally increased. For water bath canning, the time is increased. Contact your local USU Extension county office for an altitude chart specific to your county.
Have your pressure canner gauge tested annually. Canner gauges should be tested once a year before canning. Call your local county Extension office for an appointment. In many offices, you can drop your lid (with gauge attached) by their office for testing. Call first to be sure.
Follow an approved, laboratory-tested recipe and don’t make adjustments to recipes. USDA, Ball (Kerr is now owned by the same company as Ball), the Center for Home Food Preservation, and Land-grant University Extension Services such as USU Extension are the most approved recipe sources. There are many recipes that are passed around that may not be safe. Information can be found on the National Center for Home Food Preservation website at www.uga.edu/nchfpor on the USU Extension website at http://extension.usu.edu/foodpreservation/.
Fruits (high acid foods) can be canned in a boiling water canner, and vegetables and meats (low acid foods) need to be pressure canned. Although we think of tomatoes as being acidic and safe for water-bath canning, their pH level usually falls on the border, so acid should be added. Be sure to follow guidelines from an approved source. Do not can tomatoes from a dead or frost-killed vine. When vegetables are added to tomatoes, as with salsa, the pH level is raised and sufficient acid needs to be added to be safe.

Freezing Foods. Foods preserved by freezing do not have as many safety guidelines, and most of the recommendations for freezing are for quality rather than safety. Blanching is recommended for longer-term freezing to stop the enzyme activity and help preserve the quality of the fruits or vegetables.

suzanne-jorgensen
SuzAnne Jorgensen works with adult and youth groups and individuals to educate them in the areas of canning, food safety, nutrition, finances, small business and many other topics related to home, family and business through Utah State University Extension in Garfield County.


How To Can Apricots

Author – Amanda Christensen

how to can apricots

It’s that time of year again…the popcorn has popped on the apricot tree in my backyard and we are enjoying the sweet, tangy taste right from the tree. There are a number of ways to enjoy the apricots now as well as later.

When the apricots are fresh, we love to enjoy them as a fabulously refreshing smoothie. Blend five to six fresh apricots with 1/2 cup apple juice and 1 cup of ice for a delicious treat.

To keep this delicious treat available even after the harvest is over, I decided to whip out the boiling water bath canner and preserve a few quarts of apricot halves and pints of delicious apricot nectar. Here’s a step-by-step guide following the USDA canning guidelines:

Summer Apricots and the best ways to enjoy them.

Summer Apricots and the best ways to enjoy them.

Summer Apricots and the best ways to enjoy them.

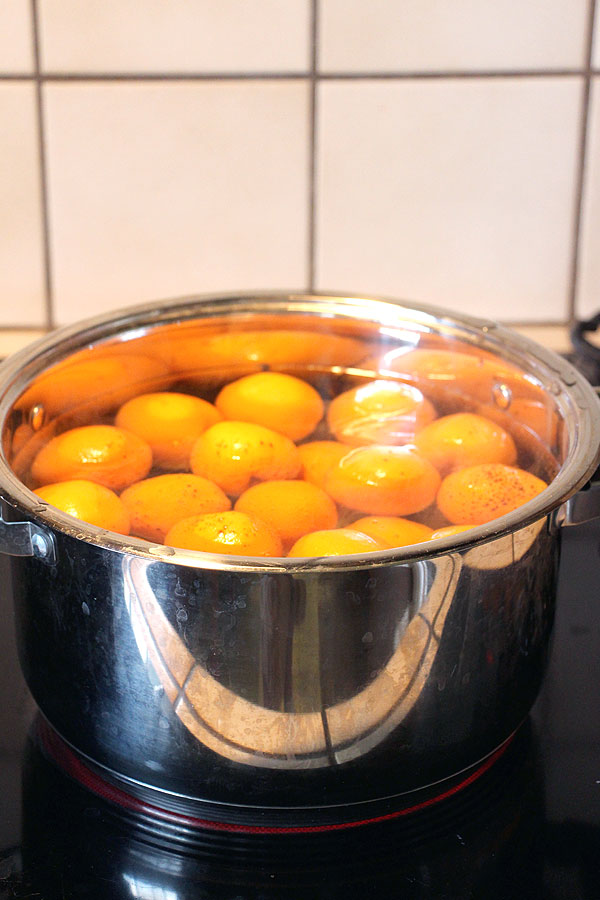
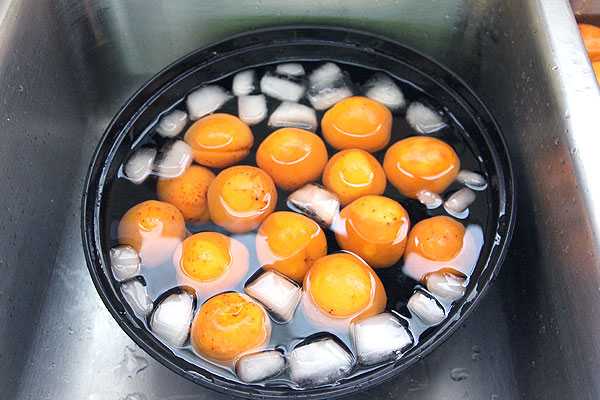
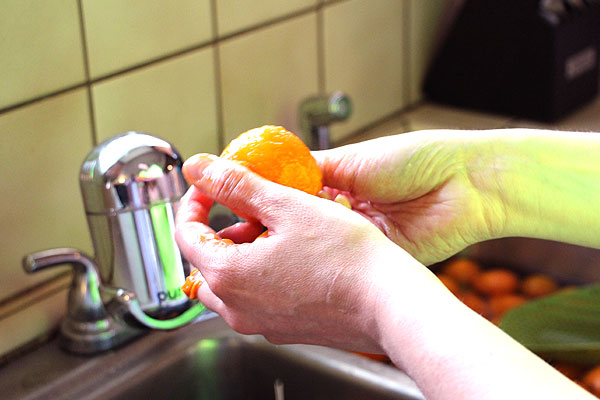
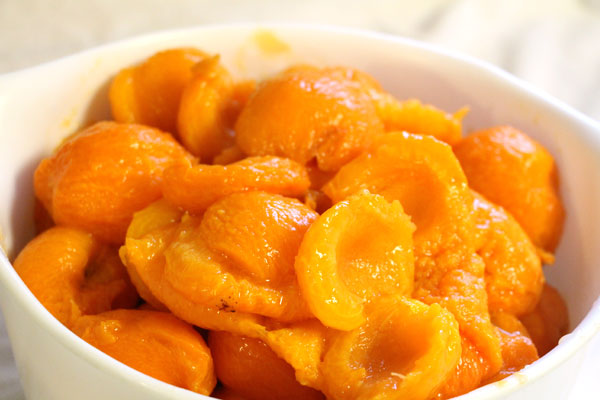
Hot Pack: Wash and blanch apricots; remove peel.

Summer Apricots and the best ways to enjoy them.

Cut in half and pit.

Summer Apricots and the best ways to enjoy them.

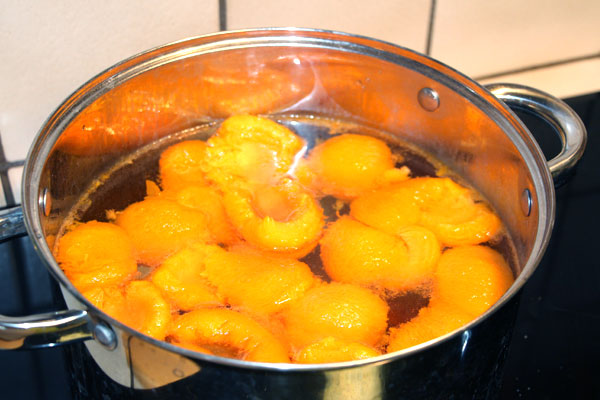
Make a light syrup by mixing 2 1/4 cups sugar with 5 1/4 cups water. Cook apricots in syrup one layer at a time until hot throughout.

Summer Apricots and the best ways to enjoy them.

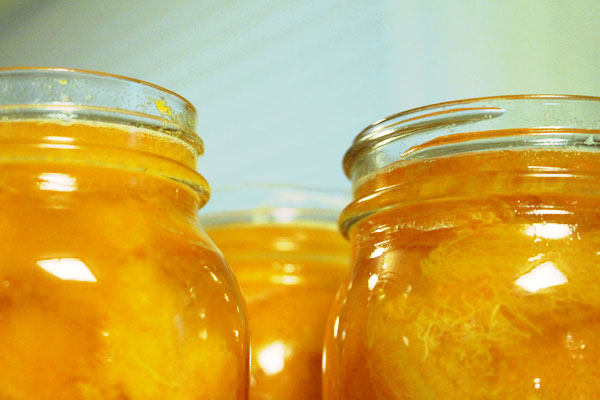
Pack hot apricots, cavity side down, into hot jars, leaving 1/2 inch headspace. Ladle hot syrup over apricots, leaving 1/2-inch headspace.

Summer Apricots and the best ways to enjoy them.

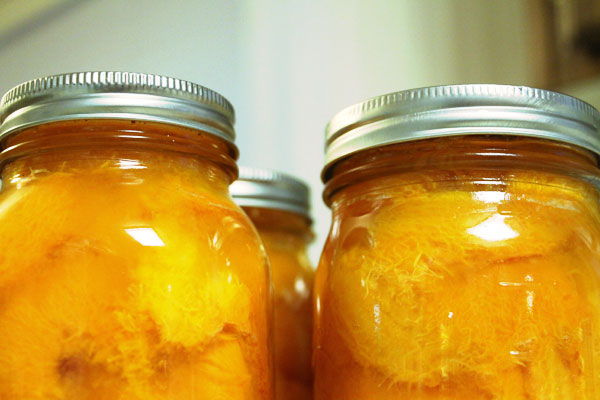
Remove air bubbles, adjust two-piece caps. If you live at sea level process pints 20 minutes, quarts 25 minutes, in a boiling-water canner.  Note the additional time needed in the chart below based on the altitude in your area:

Altitude in Feet Increase Processing Time
1,001-3,000 5 Minutes
3,001-6,000 10 Minutes
6,001-8,000 15 Minutes
8,001-10,000 20 Minutes

Summer Apricots and the best ways to enjoy them.
amanda-christensenAmanda is an Extension Assistant Professor for Utah State University. She has a master’s degree in consumer sciences from Utah State and is proud to call herself an Aggie! Amanda loves teaching and enabling individuals and families to make smart money decisions.

Follow Amanda:
Twitter: @FamFinPro
Facebook: Fam Fin Pro
Instagram: @FamFinPro


Savor the Flavors of Fresh Herbs and Spices

Author – Carolyn Washburn

Savor the Flavor. Ideas for cooking with herbs and spices.

Among the most tantalizing smells and flavors that come from your garden or kitchen emerge from fresh herbs and spices. These fragrant flavors add much to foods while helping cut back on fats, sugars and salts in recipes. Why not add some of the most used herbs and spices in your kitchen to your garden this year? You could plant fresh basil, oregano, mint and rosemary. These plants will add beauty to your garden and flavor to your foods.

An easy way to get started with herbs is container gardening. Maggie Wolf and Teresa Cerny wrote an article on herb container gardens. They list six ways to help your herbs be successful.

Choose herbs that grow in a compact habit. Herbs that are too tall can be out of scale with their container. While herbs that grow in a trailing matter can be a beautiful addition to your outside landscape, you’ll want to consider where to place your containers, how to care for them and harvesting the herbs too.

The handy Herb Container Gardens article has answers plus a useful chart listing many types of herbs, their maintenance and how to harvest.

Speaking of harvesting herbs, did you know it’s the oils from the leaves that give them their great aroma and flavor? You want these oils to be released during cooking, not during harvesting and storage. Exposure to light, overheating, bruising or cutting will release these oils before they are needed. Dennis Hinkamp references easy ways to harvest, dry, cook with and store your herbs in the article, Getting the Most out of your Herbs. The article says, “Of course the optimal way to use herbs is to pick them from the garden immediately before cooking. Since most recipes are written using proportions of dry herbs, when you substitute fresh herbs, you’ll need to add about three times as much as the original dry measure.”

Are you adding herbs to your garden this year? What are you some of your favorites to harvest and use?

Find additional articles on herbs and spices here.

carolyn-washburnCarolyn Washburn is a family consumer sciences agent for Utah State University Extension. Her responsibilities include financial management education, food safety and nutrition, healthy family relations, emergency preparedness and working with youth. Her goal is to help individuals and families become self-sustaining and resilient by being financially prepared and healthy for any emergency. She serves on the National Disaster Education Network and has just completed the new food storage manual for USDA. Her most cherished award is America’s Promise, awarded by Colin Powell.


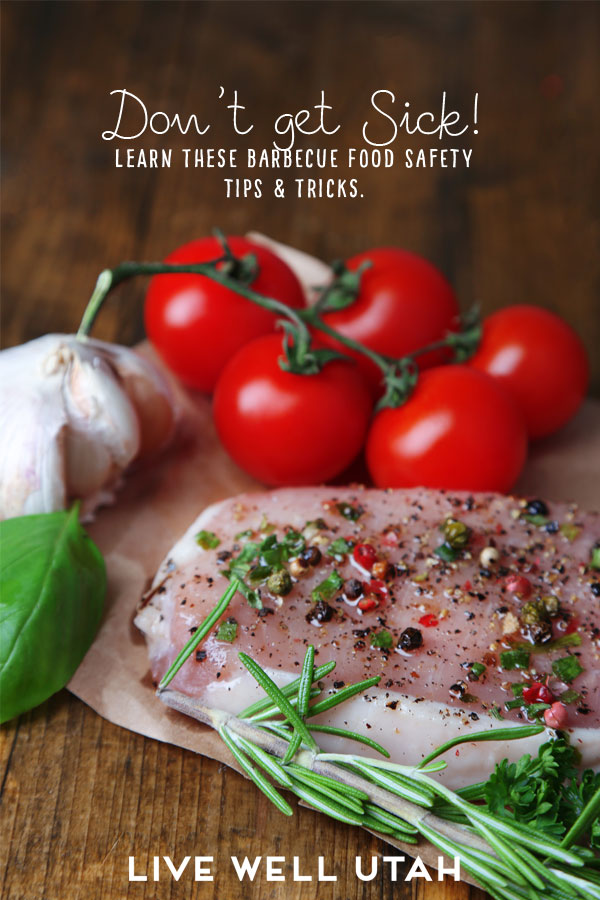
Don’t Get Sick! Learn these Barbecue Food Safety Tips and Tricks!

Author – Darlene Christensen
Don't Get Sick! Learn these barbecue food safety tips and tricks.

Have you or someone in your family ever had food poisoning? I have, and I can tell you it is miserable! It’s important to remember that it is almost 100 percent preventable (if you are preparing the food yourself). Think about these tips and tricks next time you are out barbecuing or picnicking so that you have a great time and stay healthy.

Eating outdoors in warm weather can be a food safety challenge. Bacteria in food multiply faster at temperatures between 40°F and 140°F. Cooking in the summer heat makes knowing basic food safety principles especially important.
Wash hands.
“Hand washing is THE single most effective way to prevent the spread of disease,” according to the Centers for Disease Control and Prevention. It’s really simple — make sure to wash your hands with soap and water for at least 20 seconds. To help kids learn this, try singing the ABC song with them while they wash. Cleaning up is especially important after using the bathroom and before cooking or eating. Oftentimes you find yourself outdoors with no bathroom in the summer. You can use a water jug, some soap and paper towels. Moist disposable towelettes are also good for cleaning your hands.
Keep raw food separate from cooked food.
You take the raw meat on a plate to the grill, right? But remember that you do not want to use that same plate to put the cooked meat on. This is known as cross contamination and can cause food-borne illness. Keep utensils and surfaces clean.
Marinate food in the refrigerator, not out on the counter.
Marinating can make meat tender and tasty. But if you want to use some of the marinade as a sauce on the cooked food, reserve a separate portion. Don’t reuse marinade that contained raw meat.
Cook food thoroughly.
A meat thermometer can really help in making sure meat is cooked to a safe temperature. Steaks should reach 145 degrees and then be allowed to rest for 3 minutes. Chicken should be cooked to at least 165°F. Hamburgers should be cooked to 160°F. If a thermometer is not available, make sure hamburgers are brown all the way through, not pink.
Refrigerate and freeze food right away.
It can be hard to remember while a party is going on, but food should not be left out of the cooler or off the grill for more than 2 hours. It’s especially important to remember NOT to leave food out for more than one hour when the temperature is above 90°F.
Keep hot food hot.
Hot food should be kept at or above 140°F. Hot food should be wrapped well and placed in an insulated container – this will keep the heat in. If you have purchased something like fried chicken at a deli, try to eat it within two hours. Bacteria multiply rapidly after that and can make you sick. Don’t forget to pack your meat thermometer.  When re-heating food, be sure it reaches 165°F.
Keep cold food cold.
Cold food should be held at or below 40°F. Think about potato salad and similar foods. Keep them on ice in a cooler and don’t set them out for long periods of time in the heat.
Those are the basic tips to remember. If you have ever suffered from food-borne illness, you know how miserable it is. Follow these simple steps to keep your food safe and enjoy your summer barbecues and camping trips.

darlene_christensenAuthor Bio: Darlene Christensen is an Associate Extension Professor at Utah State University and serves as the family and consumer sciences/4H agent in Tooele County. She loves working with 4Hers and enjoys teaching adults.
Reference:
US Food & Drug Administration, Barbecue Basics: Tips to Prevent Foodborne Illness.


What You Cannot Can Safely at Home

Author: Melanie Jewkes

What you shouldn't can at home - LiveWellUtah.org

Did you know that the USDA has tested and approved many recipes to preserve foods at home? There are many foods you can bottle safely at home, as long as you follow USDA-endorsed recipes and procedures. Some unique foods include grapefruit and orange sections; cantaloupe pickles; pie fillings such as apple, mincemeat and green tomato; chicken, venison and fish; hot sauce and ketchup; a variety of soups and many more. (For such recipes and procedures, see the USDA Complete Guide to Home Canning.

Have fun trying out a new (USDA-endorsed safe recipe) recipe in your kitchen this season. But, remember the possibilities are not quite endless.

Be aware that there are many foods that cannot be bottle safely at home. Why is that? One reason is that home kitchens are limited. A boiling water canner or a steam pressure canner can only get so hot. Heat is one element that is needed to kill micro-organisms that could spoil your food. A higher temperature needed for low-acid foods (like vegetables, beans and meat) is only achieved at home through a steam pressure canner.

Industrial equipment is much larger and has a different ability to bottle foods than our own kitchens.

Olive oil factory, Olive Production

Canning: Mixed Race Young Adult Woman Preserving Homegrown Fruit

Some foods or recipes have not been tested, or have been tested and have NOT been found to be safe. In some instances, the lack of approved canning recipe is due to poor quality.  Here is a list of some common foods that are NOT safe to can and NOT safe to consume.

What NOT to can (accessed from: https://extension.usu.edu/files/publications/publication/FN_Food_Preservation_2009-01.pdf )

–          Butter. That’s right, butter. In some emergency preparedness sections of stores, you might see canned butter in a tuna-fish size can. But don’t get too excited to go home and melt butter into a jar just to stick it on your food storage shelves. For now, canning butter using any method is not recommended. Some methods are dangerous, at best; others are not backed up by science. Why can butter when it freezes so easily?

–          Hydrated wheat kernels (aka wheat berries). Wheat is a low-acid food that is susceptible to botulism if trapped in a low-acid, low-oxygen, room-temperature environment. In addition, the starch in wheat may interfere with the heat penetration during canning. Insufficient processing can result in botulism food poisoning. Instead of canning, store wheat dry until used, or if hydrated, refrigerated up to several days. You may also hydrate a batch and freeze in usable portions.

–          Quick breads (e.g. banana, zucchini, pumpkin). This idea likely started when people started baking quick breads in canning jars to create a nice round loaf. However, placing a lid and ring on the jar to create a vacuum seal as it cools does not kill botulism-forming organisms that grow in warm, moist, anaerobic conditions. These items should be either baked fresh and served or frozen.  For more information see this fact sheet: https://extension.usu.edu/files/publications/factsheet/FN-FS_250_10.pdf

–          Dried Beans (pinto, kidney, etc.). To safely can dried beans, they must be hydrated first (usually 12 to 18 hours) and then brought to a boil for 30 min. Hot beans are then placed into hot jars for processing. It is not safe to put dry beans covered with water into a steam pressure canner for processing.

–          Fresh homemade salsa. There are many delicious salsa recipes to enjoy with your fresh garden produce, but these are not formulated for canning. Remember that canning recipes are scientifically studied to account for enough acid and/or processing time to keep the food safe. Fresh salsas are not formulated for canning. According to the National Center for Home Food Preservation’s Salsa bulletin, “Improperly canned salsas or other tomato-pepper combinations have been implicated in more than one outbreak of botulism poisoning.” Keep you and those consuming your salsas safe. Keep fresh salsas fresh, or freeze. Don’t experiment with canning your favorite fresh salsa. For tips on canning salsas safely, see: http://nchfp.uga.edu/publications/uga/sensational_salsa.pdf

–          Garlic, vegetable or herb-flavored oils. While these make beautiful gifts, infused oils have the potential to support the growth of C. botulinum bacteria, which grows into botulism food poisoning. These are best made fresh for use and not left at room temperature.

–          Pickled eggs. There are NO home canning directions for pickled eggs. There are some recipes for storage in the refrigerator, but in order to avoid botulism, do not leave at room temperature, except for serving time, and do not attempt to bottle for food storage.


Jewkes, MelanieAuthor bio: Melanie Jewkes works part time in Salt Lake County and has worked for USU for 6 years. The best part of her job is learning and relearning some of the things that matter most–loving and caring for marriage and family, living within your means, and growing, cooking and eating delicious, nutritious food. She is married with two adorable children and lives in Taylorsville.