What Should I Do If I Can’t Find Canning Lids?

Due to COVID-19 and a higher demand for canning supplies this season, many people have found it difficult to find new boxed lids for canning. Here are some answers to our most frequently asked questions regarding the lid shortage.

Can I re-use old or previously used canning lids?

While it might be possible to get a previously used lid to seal again, it is highly unlikely. We have had consumers tell us they tried and most, if not all, their jars did not seal. The sealing compound on the rubber part of the lids are manufactured and only guaranteed to seal once. If you choose to use an old lid, be sure to test that it sealed before storing and also test for the seal later before opening the jar.

I only have a few lids. How do I make sure they seal since I can’t get additional lids?

Process jars correctly according to recommendations from the National Center for Home Food Preservation at https://nchfp.uga.edu/. Steps to ensure a higher likelihood of sealing include:

  1. Fill jars to the appropriate headspace (the space between the food/liquid and the top of the jar).
  2. Remove air bubbles from the jar by stirring the contents slightly. Refill to headspace if needed.
  3. Wipe the rim of the jar with a clean, damp paper towel to remove any food particles that could interfere with the lid sealing.
  4. Screw the ring band on so it is finger-tip tight. If it is screwed on too tightly, it can interfere with the vacuum seal where the air bubbles escape before suctioning the lid down. Without a good vacuum seal, it could come unsealed later.
  5. For high-acid foods, process appropriately in a boiling water bath, submerging the jars completely, 2-3 inches above the top of the jar. Bring to a boil, but keep the heat at a nice rolling boil and avoid boiling that would spill over the top. That hard of a boil could create siphoning where the food is boiled out of the jar and interferes with the lid sealing. When the timer is done, turn off the heat source. Leave in the canner for 5 more minutes before removing to a surface to cool. Studies have shown this can prevent siphoning that can happen when removing the jar from a hot environment to a cooler, room-temperature environment.
  6. For low-acid foods, process in a stove-top pressure canner following the canner’s manufacturing instructions (or instructions found here: https://extension.usu.edu/preserve-the-harvest/research/principles-of-pressure-canning). Upon depressurizing the canner, leave jars in for another 10 minutes and allow to slightly cool to prevent siphoning before removing the pressure canner lid.
  7. Do NOT tip the jars when removing from the canners and do NOT touch the top of the lid until the jars have cooled on the counter for 12-24 hours after processing. If you touch it too soon, you could force a non-vacuum seal, which could come unsealed later.
  8. After 12-24 hours, check for a seal by pressing with your finger on the center of the lid. If it clicks, it is NOT sealed.
    1. If you have a jar that is sealed, remove the ring band, wash the jar of food or hard water particles, label and store without the ring band. Without the ring band, you won’t have something holding a false seal in place.
    2. If a jar did not seal, you can reprocess in the canner (if you happen to have more lids), or empty contents into a freezer container and freeze, or place in the refrigerator to consume within a week.
  9. Always check lids of sealed jars before eating. If you can lift the jar up by the lid and tug on the lid with your fingertips and the lid doesn’t come off, it is sealed. If it comes off easily, it came unsealed sometime after processing and should be thrown out. It seems wasteful, but it is better to be safe than sorry.

What about off-brand lids found in stores or online?

There is a possibility that these lids will create a vacuum seal. Studies and anecdotal stories from our callers tell us these have higher rates of failures to seal. You must weigh the risk you want to take to do all the work, then have some or many jars not seal. If you do choose to use them, consult the manufacturer’s directions and follow them for the greatest chances of success.

What about reusable three-piece lids?

These are similar to off-brand lids. Sometimes they will seal and work, and other times they come unsealed. Follow procedures carefully for preparing jars and checking for vacuum seals. The bottom line with three-piece and off-brand lids is “buyer beware.”

What else can I do if I can’t find any lids or I am not comfortable using lids known to have higher seal failure rates?

Freezing is a great method of preserving food, and most canned recipes will freeze great, including pie filling, tomatoes, salsas and more. You can also prepare your recipe as if you were going to can it, then package into freezer containers and freeze until you can acquire lids to can. Dehydrating or freeze drying are other great methods. Check out our food preservation website for how-to guides for freezing and dehydrating at http://canning.usu.edu.

By: Melanie Jewkes, Utah State University Extension associate professor, melanie.jewkes@usu.edu


September Is National Preparedness Month: Be Prepared and Informed

Winds, wildfires and flooding have been plentiful in Utah this month. Add in the pandemic, and feelings of anxiety and unrest can spike. However, it is well known that preparation can help overcome fear, and since September is National Preparedness Month, now is a great time to evaluate your preparedness supplies and plans.

The website: https://www.ready.gov/build-a-kit has an option to download a printable Basic Disaster Supplies Kit. The list also has suggestions for “unique needs” that include pets and elderly adults.

Recommendations for the Basic Disaster Supplies Kit include:

  • Water – 1gallon per person per day for at least 3 days for drinking and sanitation
  • Food – at least a 3-day supply of non-perishable foods
  • Battery-powered or hand-crank radio and NOAA Weather Radio with tone alert
  • Flashlight
  • First aid kit
  • Extra batteries
  • Whistle to signal for help
  • Dust mask to help filter contaminated air as well as plastic sheeting and duct tape to seal off windows and doors if sheltering in place becomes necessary
  • Moist towelettes, garbage bags and plastic ties for personal sanitation
  • Wrench or pliers to turn off utilities such as natural gas
  • Manual can opener for food
  • Local maps
  • Cell phone with chargers and a backup battery
  • Cash
  • Prescription medications

Other items are important, but adding size and weight to the kit may require additional portable totes or backpacks. Things for consideration include pet supplies, changes of clothing and sleeping bags. A complete list is found at the link above.

Remember that assembling a kit is not a one-and-done task; it requires regular maintenance. You may need to place a re-occurring date on your calendar to update and replenish the kit. Canned and packaged food will expire, batteries will lose power, and you may think of things to add or adapt to better suit your needs and situation.

The link also describes where to store your kits—namely in three locations:

  • Home: Keep the kits in a designated place and have them ready in case you have to leave quickly. Make sure all family members know where they are kept. Consider including a list of pre-determined additional valuables that can be located and loaded in 5-15 minutes if there is time, space and transportation available. The list can be taped to the container top or stored in a pocket of the backpack.
  • Work: Be prepared to shelter at work for at least 24 hours. Your work kit should include food, water and other necessities like medications and comfortable walking shoes. These should be stored in a “grab and go” container in an easily accessible location.
  • Vehicle: In case you are stranded, keep a kit of emergency supplies in your vehicle. It can be similar to your work kit, but you may also want to include some form of shelter and source of warmth should you need to leave your car.

The key to facing potential disasters is being informed and prepared. The suggestions for supplies listed here are important and can reduce the fear of being hungry, cold or injured. However, also take courage in the power of the human spirit, regularly demonstrated in our neighbors, families, friends and people across the nation.

By:Kathleen Riggs, Utah State University Extension family and consumer sciences professor, kathleen.riggs@usu.edu, 435-586-8132 


Ten Tips for Safe Recreation in Utah’s Wildlife Country

Outdoor recreation in Utah contributes more than $13 billion to the economy, generates over $800 million in tax revenues and provides jobs for more than 100,000 people, according to data from the Outdoor Industry Association.

Major outdoor recreation activities include camping, hiking, fishing, wildlife viewing and biking. These activities are considered quiet recreation because they do not involve motorized vehicles. Quiet recreation complies with Governor Herbert’s guidance to maintain social distancing to mitigate the community spread of COVID-19.

As more people recreate outdoors, the chance of encountering wildlife also increases. The nature of these encounters will depend on people’s knowledge about Utah’s wildlife habitats. Irresponsible recreation, particularly when camping, can endanger you and your family as well as other campers. If a wild animal receives a food reward, it will likely seek out other areas frequented by humans for food. This behavior can result in human injury as well as the removal or death of wildlife.

Consider these tips to help you enjoy Utah’s great outdoors safely.

* When camping, keep food properly stored and out of sight. If an animal can see or smell food inside your tent, camp trailer or vehicle, it may try to break in. To prevent this:

  • Secure food and trash in odor-free, bear-proof containers.
  • Keep food and strong-smelling toiletries 100 yards away from your sleeping area.
  • Hang trash or food 10 feet above the ground and 10 feet from the trunk of trees.
  • Do not leave pet food or dishes outside.
  • Do not put trash in the fire pit and burn it.

* Stay alert when hiking or biking, and stay on designated trails. Wildlife are most active at dawn and dusk.

* Always hike, jog or bike with a companion, and make noise to alert animals of your presence.

* Keep children safe when hiking. Keep them within the group or in sight just ahead of your group.

* Make noise to alert wildlife of your presence, and void wearing ear buds or headphones that prevent you from hearing approaching wildlife. Being “plugged in” also prevents you from enjoying the sounds of nature.

* Stay away from animal carcasses, as there could be an unseen predator guarding its meal.

* Do not toss food or trash along trails.

* When hiking with pets, keep them supervised and under control. Dogs off leash can chase, injure or kill wildlife, and it is against the law for dogs to harass wildlife. In addition, your pet can be seriously injured if attacked by a wild animal.

* Observe from a distance. Viewing animals in the wild can be exciting, but keep your distance. If you encounter wildlife on a trail, stay at least 50 feet, or three car lengths, away from the animal. Always give the animal a clear escape route. Crowding it can cause it to attack.

* Be aware that Utah is home to several species of venomous rattlesnakes. Snakes can hide on open trails and dense grasses. Look carefully before you set your hands or feet down or sit. Always stay on paths and cleared areas, and wear closed-toed shoes while hiking.

For more information, visit WildAwareUtah.org.

By: Terry Messmer, Utah State University Extension wildlife specialist, terry.messmer@usu.edu, 435-797-3975


Tips for Weathering Winter Storms

SNOW REMOVAL

The recent frigid Arctic air encompassing much of the mid-west caused mass transit, businesses and schools to shut down. It also was responsible for several deaths. If you were caught in such adverse conditions, unable to leave home because of a snow/ice storm or you were in your car stuck in a snowbank several miles from home, how would you fare?

The best tips for enduring winter cold and storms are: be informed, be prepared, be cautious and be a good neighbor. The Emergency Preparedness site, https://www.ready.gov/winter-weather has information for staying safe in a variety of emergency situations, including harsh winter weather. Consider these tips.

If you are under a winter storm warning, find shelter right away.

  • Stay off roads.
  • Stay indoors and dress warmly.
  • Prepare for power outages.
  • Use generators outside only and away from windows.
  • Listen for emergency information and alerts.
  • Check on neighbors.

Prepare now to stay safe when a winter storm threatens.

  • Know your area’s risk for winter storms. Extreme winter weather can leave communities without utilities and other services for long periods of time.
  • Help keep your home warm by having proper insulation, caulking and weather stripping. Learn how to keep pipes from freezing. Install and test smoke alarms and carbon monoxide detectors with battery backups.
  • Pay attention to weather reports and warnings. Sign up for your community’s warning system. The Emergency Alert System (EAS) and National Oceanic and Atmospheric Administration (NOAA) Weather Radio also provide emergency alerts.
  • Gather supplies in case you need to stay home for several days without power. Keep in mind the specific needs of each person, including medication. Do not forget to plan for the needs of pets if you have them. Have extra batteries for radios and flashlights.
  • Create an emergency supply kit for your car. Include jumper cables, sand, a flashlight, warm clothes, blankets, bottled water, and non-perishable snacks. Keep the gas tank full.

To stay safe during a storm:

  • Stay off roads if possible. If trapped in your car, stay inside. If you must leave the car, wear layers of warm clothing and limit time outside.
  • Avoid carbon monoxide poisoning. Only use generators and grills outdoors and away from windows. Never heat your home with a gas stovetop or oven.
  • Reduce the risk of a heart attack. Avoid overexertion when shoveling snow.
  • Check on neighbors. Older adults and young children are more at risk in extreme cold.

Recognize and respond:

  • Frostbite causes loss of feeling and color around the face, fingers and toes.
  • Signs include: numbness, white or grayish-yellow skin, firm or waxy skin.
  • Actions: Go to a warm room. Soak in warm water. Use body heat to get warm. Do not massage or use a heating pad.
  • Hypothermia is an unusually low body temperature. A temperature below 95 F is an emergency.
  • Signs include: shivering, exhaustion, confusion, fumbling hands, memory loss, slurred speech and drowsiness.
  • Actions: Go to a warm room. Warm the center of the body first—chest, neck, head and groin. Keep dry and wrap body, head and neck in warm blankets.

Be sure you have an alternative heat source and food and water storage. Preparation will increase your family’s confidence and ability to survive extreme winter weather conditions.

By: Kathleen Riggs, Utah State University Extension family and consumer sciences professor, 435-586-8132,kathleen.riggs@usu.edu 


Preventing Wildlife Attacks: Let Common Sense Overrule Curiosity

wildlife sq.png

Summer and autumn are gorgeous seasons for outdoor activities. Camping and visiting national parks are some of the most popular. Who doesn’t love spending time in the great outdoors?

While you’re soaking up the sun and enjoying time with the family it’s important to remember that you’re a guest in nature. Be sure to exercise caution and avoid wild animals!


Recent media reports of wildlife attacking humans have many people concerned and reconsidering their time spent outdoors.


Utah wildlife species that have been implicated in attacks on humans, livestock and pets include black bears, mountain lions, moose, elk, mule deer, coyotes, raccoons, turkeys, rattlesnakes and bison. Negative interactions with large ungulates are becoming more common place as humans are increasingly recreating in animal territory, and it’s important to not let human curiosity overrule common sense.


Recent altercations in Yellowstone National Park attest to the value of common sense over curiosity. In June, a bison gored a woman in the Lower Geyser Basin. Before the attack, the woman and other people were within 10 yards of the animal as it crossed a boardwalk. The animal became agitated and charged. Also in June, and in the same area, two women were attacked by a cow elk when they got between the cow and her calf; the cow was defending her calf.


Since 1980, Yellowstone National Park has had over 100 million visitors. During this time, 38 people were injured by grizzly bears in the park. Though this is more than anyone wants, according to the Park for all park visitors combined, the chances of being injured by a grizzly bear are 1 in 2.7 million. For Park visitors who remain in developed areas, roadsides and boardwalks, the risk decreases to 1 in 25.1 million. For those who camp and travel in the backcountry, the risk increases to 1 in 1.4 million for those who stay overnight and 1 in 232,000 for those who travel in the back county.


Although there will always be risks, they can be managed by using common sense and following simple rules.

  1. First and foremost, always remember that Utah is wildlife country. It is home to an abundance of wildlife, which is why so many people are drawn to our state.
  2. Should you encounter wildlife while hiking, biking or camping, remember that distance is your best friend. Most of the attacks reported occur because someone wanted to get that once-in-a-lifetime selfie. Always give the animal a clear path to escape.
  3. If you do encounter wildlife, stay calm and do not run. Pick up children or pets with you. This is the one time that you can be as obnoxious as possible outdoors. Puff up you chest, shout and stomp your feet. Back away slowly. And again remember, do not run!
  4. If a moose, elk or deer knocks you down, curl up in a ball, protect you head and lie still until the animal moves away.
  5. If attacked by a large predator, fight back!
  6. If you encounter a rattlesnake, stop, listen to locate where the rattle is coming from and back away to allow the snake to escape.

Follow these rules for camping:

  1. Keep a clean, odor-free campsite by storing food, drinks and scented items securely in wildlife-proof containers at least 100 yards from your tent. Keep trash away from your campsite, and do not burn it in your fire pit.
  2. Clean your tables, stoves and grills to remove food or odors that could attract wildlife.
  3. Keep your pets leashed in camp and stay with them on the designated trails. Do not let your pet chase or “play” with wildlife, as your pet may be viewed as food.
  4. Always hike, jog and camp with companions.
  5. If you find a wildlife carcass, stay away from it. You could be perceived as messing with a predator’s food, which could cause them to become aggressive.

If you have an encounter with aggressive wildlife, alert the Utah Division of Wildlife Resources office nearest you. For further information on wild animal attacks, visit wildawareutah.org.


This article was contributed by Terry Messmer, Utah State University Extension wildlife specialist.
terry.messmer@usu.edu


Eight Reasons to Consider Canning

food canning

Canning your produce can make your harvest go a long way. The practice is economically beneficial and preserves your gardening efforts!


Now that gardens are planted and fruit trees are showing signs of small fruit, many people begin planning how they will preserve the harvest – canning, freezing, drying and even freeze-drying. However, even die-hard food preservers may ask at times if the efforts of growing produce and preserving are really worth it. Here are eight things to consider.

            Emergency preparedness – Preparing for potential job loss, earthquakes or other natural disasters serve as incentives for many to participate in food storage and preservation.

            Economically beneficial – Whether food preservation actually saves money depends on several factors: if you are able to grow your own high-quality produce; if you own the correct equipment in very good to excellent condition; the cost of electricity, natural gas or propane; and the cost of added ingredients and supplies such as sugar, pectin, lids, bottles or freezer bags. A first-time food preserver may find it cost prohibitive to purchase a new pressure canner, dehydrator, or water-bath canner along with all the containers, etc., but those can be purchased over time.

            Time saving – When considering this factor, it is important to think beyond the actual time to harvest, prepare and preserve the food. The time savings actually comes into play down the line when the convenience of having a bottle of stewed tomatoes or frozen chopped onions and peppers on hand to make spaghetti sauce alleviates a trip to the grocery store or time spent preparing these items fresh.


            Quality control – Time from harvest to jar or freezer is minimized when you can pick peaches in the morning and have them canned that same afternoon. Sometimes several days go by between harvesting/picking in a commercial orchard to the processing plant. Also, when it’s your hands sorting through the produce to make certain everything is cleaned and unwanted pieces are discarded, you are more confident in the overall quality of what you preserve.

            Flavor – In general, it is difficult to find commercially preserved foods without added salt, sugar, spices and in some cases dyes and firming agents or other additives. To a large degree, home preserved foods can be prepared with reduced salt/sugar and added spices in your preferred amounts.

            Health benefits – Those who have food allergies must always be on the watch for commercially prepared foods that have possible contamination from tree nuts, gluten and other potentially harmful allergens. Besides the freshness factor, when food is preserved at home, you are in control and can ensure that foods are properly prepared for your family. Reduced sugar recipes for diabetics and lowered salt content for family members with high blood pressure can also be used.

           Reduced food waste – Home gardeners often produce more food than can be harvested and used fresh. For example, rather than having many stalks of ripened corn go to waste, cobs can be shucked, then cobs or kernels may be blanched and frozen. Remaining stalks can then be donated to a farmer to be used to feed goats or other livestock.

            Emotional satisfaction – The idea of producing high-quality foods for future use – and from scratch – can be very satisfying. The best way to feel totally confident in what is sitting on the shelf or in the freezer is to simply follow the approved guidelines and steps established by science and research; not necessarily from a blog, Pinterest or a Facebook post.

For more information on home food preservation, contact your local USU Extension office or visit the National Center for Home Food Preservation at www.nchfp.uga.edu.


This article was written by Kathy Riggs, Utah State University Extension professor, kathleen.riggs@usu.edu or 435-586-8132


Ask an Expert // What should I do with all these dried beans?

Dried Beans
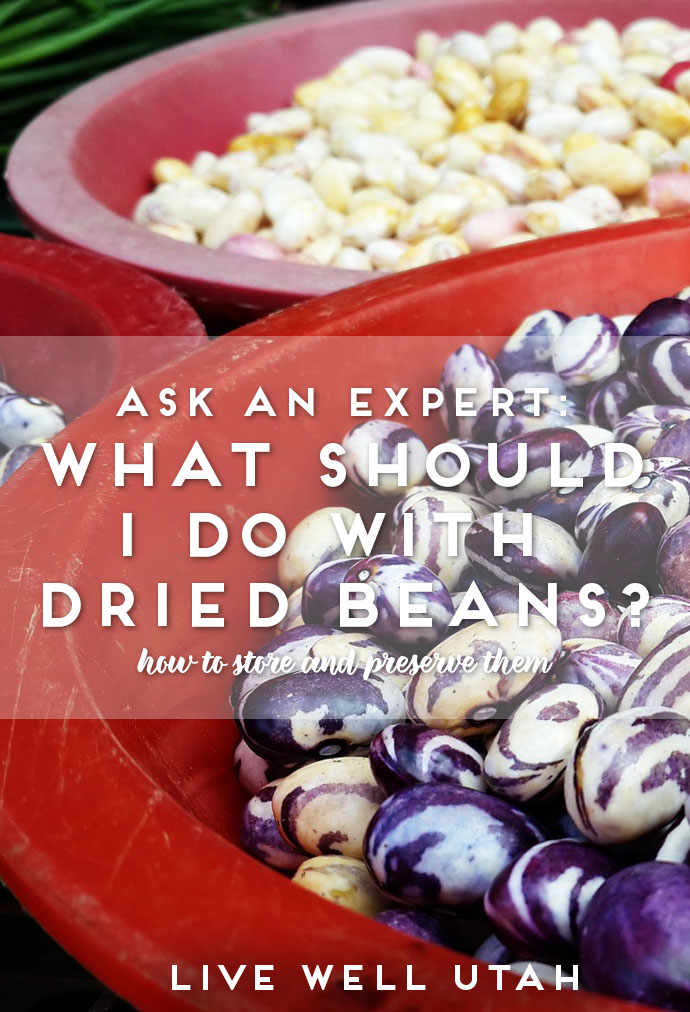
Dried beans can be a great addition to your pantry and food storage. Read on to find out how to properly store and preserve dried beans.


This time of year, case lot sales are common. Among bulk items being offered are several foods known to store well for several years, when handled properly. Among those food items are several types of dried beans, sold in paper or plastic packaging.

Unless your family cooks with beans on a regular basis, a 25-pound bag of dried beans may seem a bit intimidating, or even impossible, to use up within the foreseeable future. If this sounds like you, here are some storage options to consider so you will have quality beans available when you need them for months or years ahead.

Utah State University Extension provides the following information to consumers wishing to add dried beans to their long-term food storage.

Storing dried beans

Quality & Purchase. For the most part, dry beans are graded U.S. No.1 (best) through U.S. No. 3, based on defects. Lesser quality beans are generally graded “substandard” or “sample.”

Packaging. Like most stored foods, beans are best stored in the absence of oxygen and light. Oxygen can lead to rancidity of bean oils and light will quickly fade bean color. The best packaging choices are #10 cans or Mylar-type bags. Canning jars are suitable for smaller quantities providing the jars are stored in a dark place. Oxygen absorbers should be used to remove oxygen from the packages to extend shelf life and minimize off-flavors.

Storage Conditions. Beans in normal polyethylene (food-grade) bags have a shelf life of 1 year or more. Like most stored foods, colder storage temperatures will increase shelf life. When packaged in #10 cans or Mylar-type bags, with the oxygen removed, they have a shelf life of 10 years or more. A BYU study indicated that samples that had been stored up to 30 years had greater than 80 percent acceptance by a consumer taste panel for emergency food use.

Use from storage. All dried beans, except lentils and split peas, require soaking in water for rehydration. Typically, 3 cups of water are needed for every 1 cup of dried beans. Allow beans to soak overnight and then rinse them in clean water. To cook beans, cover rehydrated beans with water in a stock pot. Simmer for 2-4 hours until beans are tender. Once tender they can be spiced and used in cooking recipes. As dried beans age, the seeds become harder. This results in longer rehydration and cooking times. At some point, the seeds will no longer rehydrate, and in that case, must be ground as bean flour. 

Preserving Dried Beans

It is common for home food preservers to “bottle” or “can” dried beans so they are hydrated and ready to use in recipes. For safety reasons, it is important to follow current guidelines for preserving dried beans as described by the National Center for Home Food Preservation. If you are new to pressure canning, visit this website and read how to safely use a pressure canner or contact your local county Extension office.

Procedure: Place dried beans or peas in a large pot and cover with water. Soak 12 to 18 hours in a cool place. Drain water. To quickly hydrate beans, you may cover sorted and washed beans with boiling water in a saucepan. Boil 2 minutes, remove from heat, soak 1 hour and drain.

Cover beans soaked by either method with fresh water and boil 30 minutes. Add ½ teaspoon of salt per pint or 1 teaspoon per quart to the jar, if desired. Fill jars with beans or peas and cooking water, leaving 1-inch headspace. Adjust lids and process as a hot pack;  pints for 75 minutes; quarts 90 minutes at 15 pounds pressure (altitudes 3,000-6,000 ft.) or 13 pounds with a dial-type gauge tested for accuracy by the local Extension office. WARNING: Do not place dried beans in a jar and add water as a method to prepare beans for processing. To guarantee safety, beans must be hydrated first!

Whenever you get in the mood for fresh-cooked chili, humus, beans and ham hocks or refried beans, having quality beans on hand that have been prepared and stored properly will be a great asset to your menus.


Kathleen Riggs is the Utah State University Extension family and consumer sciences professor for Iron County. Questions or comments may be sent to Kathleen.riggs@usu.edu or call 435-586-8132.


Preparedness Ideas You Might Have Forgotten

preparedness


  • How many phone numbers do you have memorized? If your cell phone is down, so is your phone list.
  • How can you help? When you get to an evacuation gathering site, do you have skills to help take care of frightened children? Computer skills to help take down information? Carpentry skills to help rebuild or stabilize homes?
  • How many people do you know by name on your street? Can you recognize their children—more importantly, can their children recognize you?
  • How long can you stay cheerful?

The current buzzword in community help agency circles is resilience. It’s the ability to cope and overcome problems. Resiliency in a community is key in recovering from disasters, or just plain hard times. Community resilience is built on a foundation of people knowing each other. If you don’t know the people who live next door to you, or behind you across the fence, or on the other side of town, you can’t help them and they can’t help you. I’ve heard that when a natural disaster first hits an area, everyone bands together—the first week. By the end of the month, everyone is “all funned out,” as Cuzco says in The Emperor’s New Groove, but the rebuilding has only just begun.

Popular Mechanics has a special edition of “The Ultimate Survival Guide” on newsstands, so you can “adapt like the Special Forces.” Ultimately, survival depends on how a community can work together using the knowledge and experience of everyone in it. That sense of community starts now: know the people around you, know the people on the other side of town, know what you can do to help once you’ve been helped.

It’s not the Apocalypse we have to worry about: it’s each other.

Interested in learning more about preparedness? Come to the Utah Prepare Conference and Expo this Friday and Saturday, September 8 & 9 at the South Towne Expo Center in Sandy.


This article was written by Cathy Merrill, USU Extension Assistant Professor, Utah County


Ask An Expert // Six Tips for Portable Emergency Food Storage

emergency foodWhat would your family eat in an emergency? Get prepared with these six expert tips on portable emergency food storage.


Weather can regularly create emergency situations such as massive power outages, dangerous road conditions or flooding across the nation. In Utah, we are not without our share of emergency weather-caused situations that can leave people stranded, without heat or lights for several hours or stopped on the freeway due to a car accident.

While these situations can be frustrating at best, some can mean there will be no relief for up to 72 hours. How would you fare if you were home or in your car “stuck” with only what you have on hand to help you survive? Would you have sufficient supplies of food and water and a source of heat/warmth and other emergency items to last for 3 or more days?

If you are new to food storage and/or emergency preparedness, this question may be difficult to answer. However, even for those who think they are prepared, it’s good to review some basics and examine what goes in a 72-hour emergency kit.

Below are six tips for preparing your portable emergency supply, adapted from USU’s online publication, “A Guide to Food Storage for Emergencies.”

1. Foods to include in the 3-day/72-hour kit:

According to the Federal Emergency Management Agency (FEMA 2012), the general guidelines are to stock canned foods, dry mixes and other staples that do not require refrigeration, cooking, water or special preparation along with a manual can opener and eating utensils. Examples include:

  •  Ready-to-eat canned meats, fruits and vegetables
  • Protein or fruit bars
  • Dry cereal or granola
  • Peanut butter
  • Dried fruit
  • Nuts, chips or crackers
  • Food for infants
  • Powdered drink mixes to add to water
  • Comfort/stress foods, candy bars, etc.

2. Beverages to include in the 3-day/72-hour kit:

  • Bottled water
  • Soda or juices (Avoid diet sodas if possible since the artificial sweeteners break down and can cause an off flavor in soda stored beyond the expiration date. Regular soda will just taste flat.)
  • Non-perishable pasteurized milk (Sold in cartons; does not require refrigeration.)

3. How to store the 3-day/72-hour supply kit:

In case you are home and need to evacuate on short notice, these supplies should be stored in a convenient location close to a front door or garage. Use one or two portable containers. Consider a tote on wheels with a handle, backpacks, etc., that are easy to move. Be sure they will fit in your car and that they can be carried or pulled to a safe location if you need to leave the car.

4. Amount of water to include:

The recommendation is 1 gallon of water per person (adult) per day. However, the requirement for staying hydrated varies according to age, physical condition, activity, diet and climate. Bottled water is the easiest to store; whether it is purchased in individual serving sizes or larger containers such as 3-liter jugs. Again, consider how you will carry this with you.

5.  How to keep food cold or frozen at home:

If you experience a power outage that doesn’t require you to leave your home, make certain perishable foods remain useable for as long as possible. If you have enough warning or have extra space in the freezer, fill empty spaces with bagged blocks of ice or fill clean plastic containers/jugs with water and freeze. Food in the freezer may not stay completely frozen but will stay cold for 1-2 days. Foods in the refrigerator may fare better if they can be transferred into insulated ice chests and covered with cubed ice.

6. How to maintain emergency food storage:

It is not only important to obtain a 72-hour supply of food and water, but also to store it safely and rotate the food to keep it appetizing and safe to eat.

  • Keep the foods in a cool, dry place.
  • Store in tightly closed plastic or metal containers to protect from pests and to extend shelf life.
  • Throw out any canned goods that have become dented, show signs of corrosion or are bulging.
  • Use foods by their expiration/freshness dates and replace as necessary.
  • Rotate water storage annually.
  • Re-evaluate your food and water storage needs annually as families expand or get smaller in numbers.

The initial expense of time and money to establish a 3-day emergency food supply may seem daunting. However, once established, you can reduce the sense of fear, knowing you are prepared and can keep your family nourished during an emergency situation.


This article was written by Kathleen Riggs, Utah State University Extension professor, kathleen.riggs@usu.edu, 435-586-8132


Water // The First Step for Family Preparedness

Water Preparedness.jpg
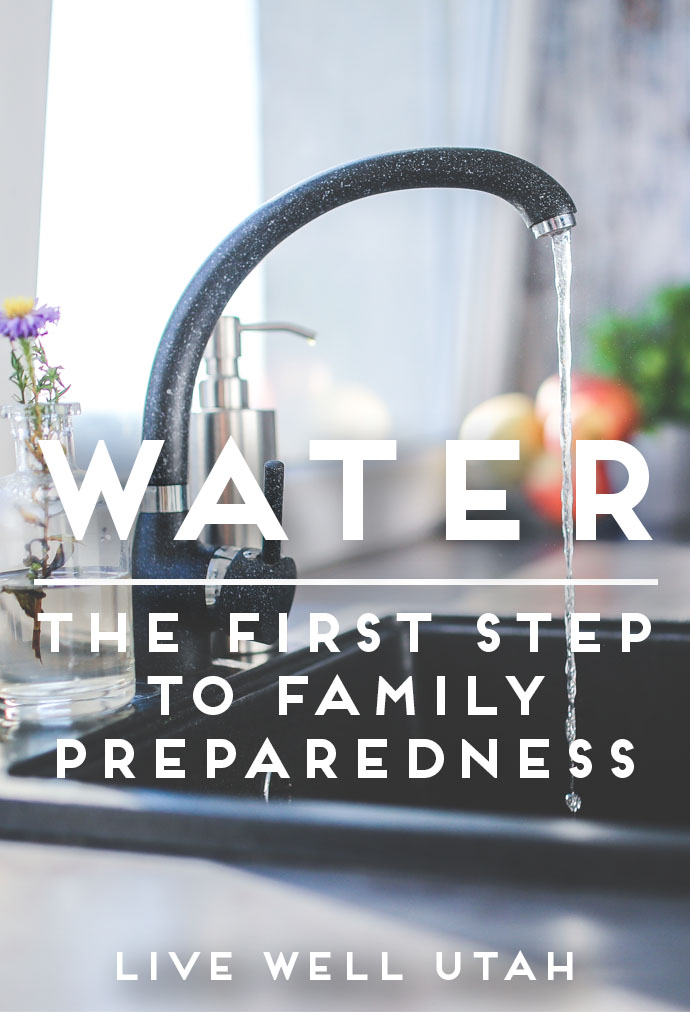
Want to build up your family’s emergency supplies, but not sure where to start? A great first step is to store water. Find out how to get started here!


The human body is made up of 65 percent water, and it is necessary for our existence. Water helps our blood flow, carries oxygen and nutrients to our cells, flushes waste products from our body and even cushions our tissues and joints. It is also a critical component in food digestion. Water is fundamental for our daily life.

Providing for our water needs in the event of a disaster becomes a top priority, as water may have been interrupted or contaminated. Each person will need at least 1 gallon of water per day. For home storage, you should have at least a 2-week supply of water available for each person for drinking and sanitation. Water should be stored in food-grade containers such as glass jars, metal or plastic containers. Previously used juice and milk containers are not acceptable, as food proteins are difficult to remove, and the grade of plastic might not be adequate.

Treatments may be necessary if water is from a non-sterile source. Suggested methods are:

  •    Heat treatment-boil water 5-10 minutes. Use water bath processing for glass jars. 
  •    Chemical treatment Unscented Chlorine Treatment –8 drops per gallons (less than 1/8 tsp), or 2 drops per quart. Let stand for 30 minutes. For cloudy water, use 24 drops per 2 gallons (4 drops per quart). If still cloudy, repeat, let stand 15 minutes, and dispose if still cloudy. Water should have a slight bleach odor. If not, repeat and wait another 15 minutes. The treated water can then be made palatable by pouring it between clean containers several times. 

    Nearly all available liquid chlorine bleach is now concentrated. Amounts that are required for treatment are less than in previous years. Beware of expiration dates. If the bottle of bleach is older than 4 months, it should not be used as a water purifying agent. Bleach will dissipate after 1 year.

  •      Other forms of treatment are iodine, water purification tablets, distillation and filtration. The CDC (Centers for Disease Control) has recently approved the use of colloidal silver in low doses for maintaining microbiological quality of stored water.  

Additional emergency sources of water may be:  Potable water from pipes, water heater, ice cube trays and beverages. Do not use water from swimming pools, toilet tanks or waterbeds for drinking. Chemicals have been added to these, making them unsafe.

When potable (drinkable) water is properly disinfected and stored in ideal conditions, it should have an indefinite shelf life.  To maintain the optimum quality, water should be rotated every 6 months.    

Water storage is the first important step to preparedness. It is cost effective and something you can do today. Begin by storing in small containers, then work toward the 50-gallon barrels.  These should not be stored on the dirt or direct concrete, as they will absorb orders. Containers that are filled from the tap (city water) will not need treatments.  


This article was written by Carolyn Washburn, USU Professor